1. Objectives and Scope
Based on the practical requirements, this article focuses on the following objectives:
- Process Summary: Objectively read and summarize the reference article, highlighting how to maintain design consistency through Google Stitch’s DESIGN.md feature.
- Creative New Use Case (B2B Dashboard): Instead of re-using the self-intro website example from the original post, I will act as a Product Manager/Designer to design a highly specific enterprise B2B System Management screen.
- Application Analysis: Provide personal viewpoints on how this method solves daily “pain-points” in the Design-to-Dev handoff process.
2. Objective Summary of the Reference Tutorial
The reference article (Google Stitchがだいたい理解できるハンズオンマニュアル) presents a highly practical 8-step process for “Non-designers” to create applicable designs:
Step 1: Login and setup: Log into Google Stitch, define needs, and select the appropriate mode (Web or App).
Step 2: Define direction (Policy First): Before drawing the UI, define 4 core elements: Target audience, Screen objective, desired Tone & Mood, and Impressions to avoid.
Step 3: Create a rough draft: Feed those 4 elements into the system for the AI to generate an initial draft. Don’t focus on aesthetic details yet.
Step 4: Extract Design System & DESIGN.md: Instruct Stitch to standardize the draft into a complete Design System (Colors, Typography, Layout spacing) and crucially export these rules to a text file named DESIGN.md.
Step 5: Apply Design System: Use the newly created rule set and apply it back to the initial draft page, enforcing consistency in visual hierarchy and styles.
Step 6: Prototype Validation: Run Preview/Prototype mode to ensure the UX flow makes sense (users can scan information quickly).
Step 7: Connect Claude Code via MCP: Establish an API connection (Model Context Protocol) between Google Stitch and the AI programming tool (Claude Code).
Step 8: Code Micro-Fixes: Ask Claude Code to pull the UI source code to a local environment and make minor edits directly in the codebase instead of manually tweaking the design tool, fully respecting the DESIGN.md rules.
Core Takeaway: The article advocates “Set rules first – polish later”. Utilizing DESIGN.md is the ultimate key to preventing “style drift”, a common flaw in previous generation AI generators.
3. Hands-on: Building a B2B System Management Mockup
3.1 Initialize Policy (Input Brief)
Aiming for a professional B2B system rather than a Consumer App, I mapped out the following direction:
- Audience: Operation managers, Support leads.
- Objective: Real-time system health monitoring (KPIs), incident handling, queue management.
- Desired Feeling: Intuitive, Reliable, Control Tower, Modern but serious.
- Impressions to avoid: Overly flashy, playful, space-consuming marketing graphics. Requires excellent “Data Density”.
Action step 1: Open the Google Stitch homepage, login, and select Web mode.
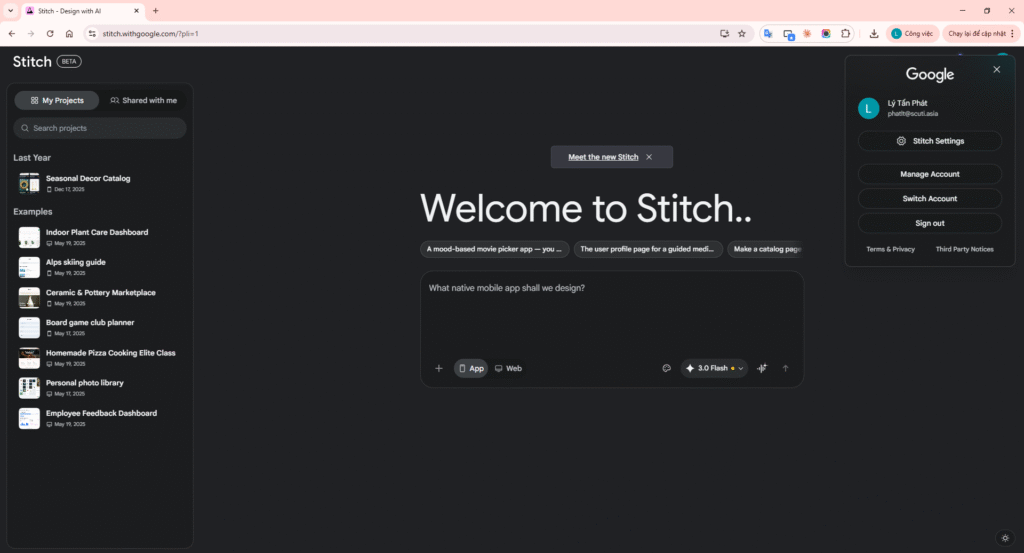
Image 1: Google Stitch Homepage
Action step 2: Policy serves as a “guiding principle” for the project.
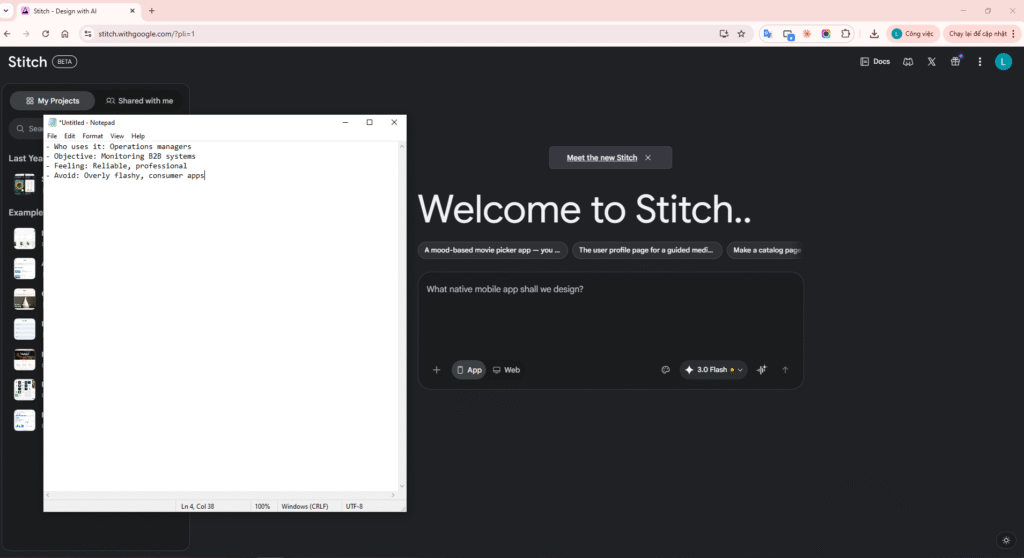
Image 2: Drafting project direction (Brief) on Notepad
3.2 Enter Prompt for Rough Draft (Rough Mockup)
Design a desktop B2B system management dashboard for enterprise operations.
Audience: operation managers and compliance teams.
Main sections:
– Top navigation with environment badge and global search
– Left side navigation (Overview, Incidents, Users, Integrations, Billing, Audit)
– KPI row: Uptime, Active Incidents, Queue Backlog, SLA Breach Risk
– Incident table with severity, owner, status, updated time
– Right action panel for “Assign owner”, “Escalate”, “Resolve” Style: professional, standard data density, high readability. Avoid playful visuals and avoid marketing-style hero blocks. Focus on utility.
Action step 3: Paste the detailed Prompt into Stitch’s Chat box to let AI start working.
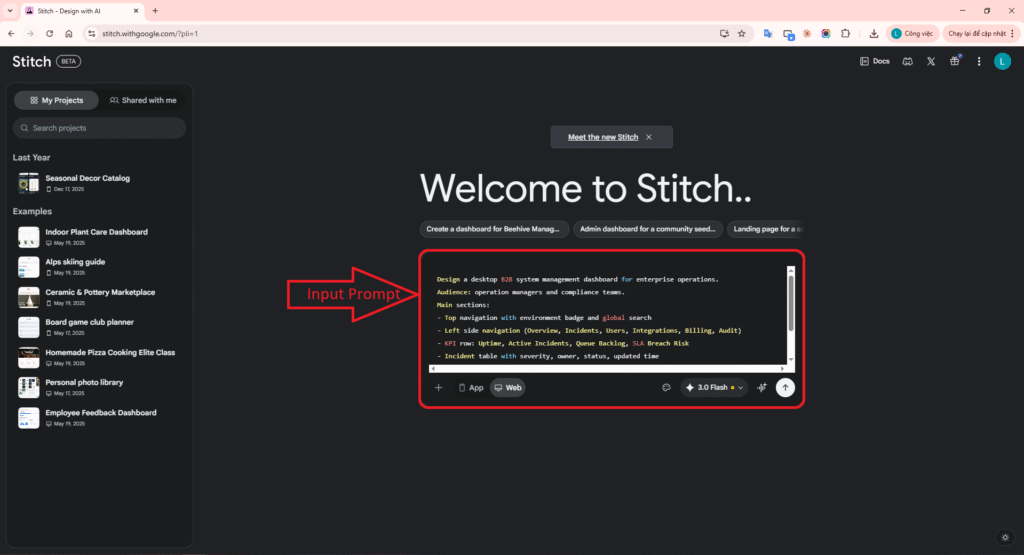
Image 3: Entering the first detailed prompt to build the B2B system
Action step 4: Press Send (Enter) and wait for the AI to draw the rough screen (Rough Mockup).
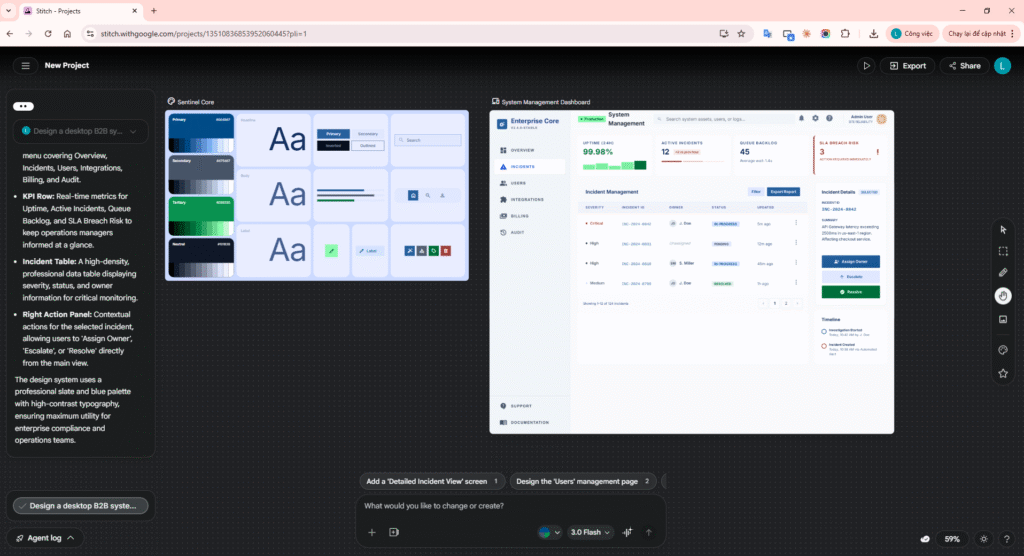
Image 4: The Rough Mockup generated by AI
Action step 5: Click on the Data Table, a mini-tool will appear, enter a prompt requesting warning colors (red/yellow) for the Status column.
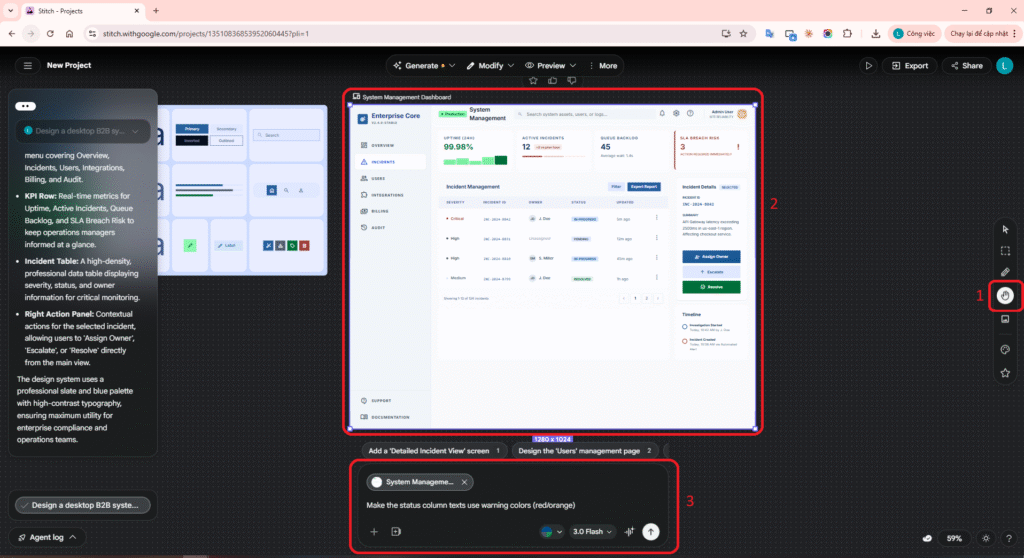
Image 5: Local micro-iteration on a UI element (Table)
3.3 Extract DESIGN.md Rules Prompt
From this B2B dashboard draft, create a reusable enterprise design system. Organize into: – Color roles (Primary, Warning, Critical, Backgrounds) – Typography (Headers, Body, Dense Table Data) – Spacing (Rhythm for high-density cards) – Components (nav, KPI cards, table, status badges, action area) – Layout principles (Grid distribution, Sidebar behavior) Prioritize consistency, auditability, and enterprise clarity over decoration. Generate a DESIGN.md containing these precise metrics and hex codes.
Action step 6: Paste the Design System prompt into Chat. A color palette and typography board will be drawn alongside it.
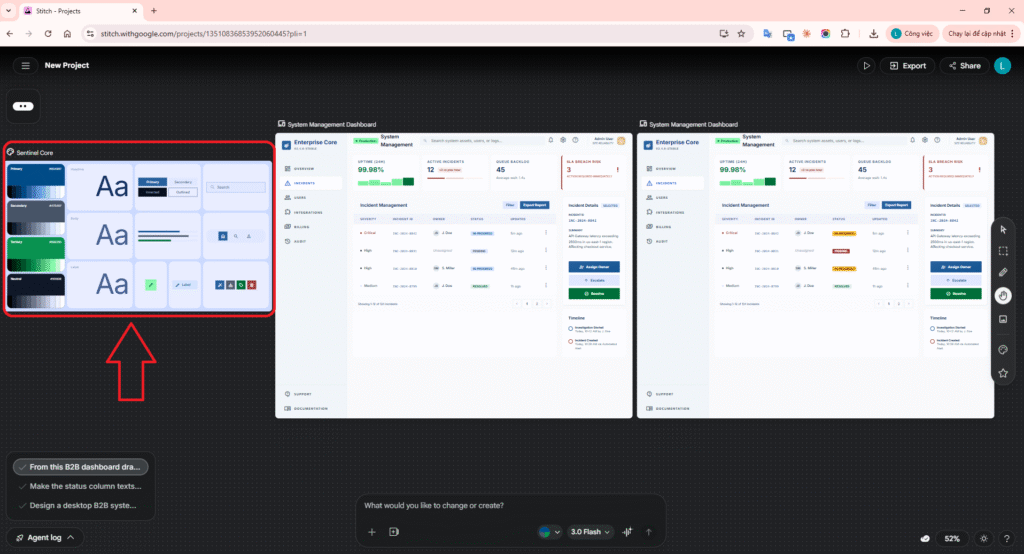
Image 6: Design System Board
Action step 7: Ask AI to export those rules into source code format DESIGN.md (Generate the DESIGN.md code).

Image 7: Exporting rule sets to DESIGN.md file
3.4 Apply Design System Prompt
Apply the generated design system (from the DESIGN.md rules) strictly back to this dashboard screen. Align the heading hierarchy, spacing rhythm, table density, and component consistency automatically. Keep the information architecture (KPIs, Tables, Sidemenu) exactly the same, only homogenize the visual language.
Action step 8: Re-select your initial draft frame. Paste the Apply prompt to force AI to map the DESIGN.md colors/spacing.
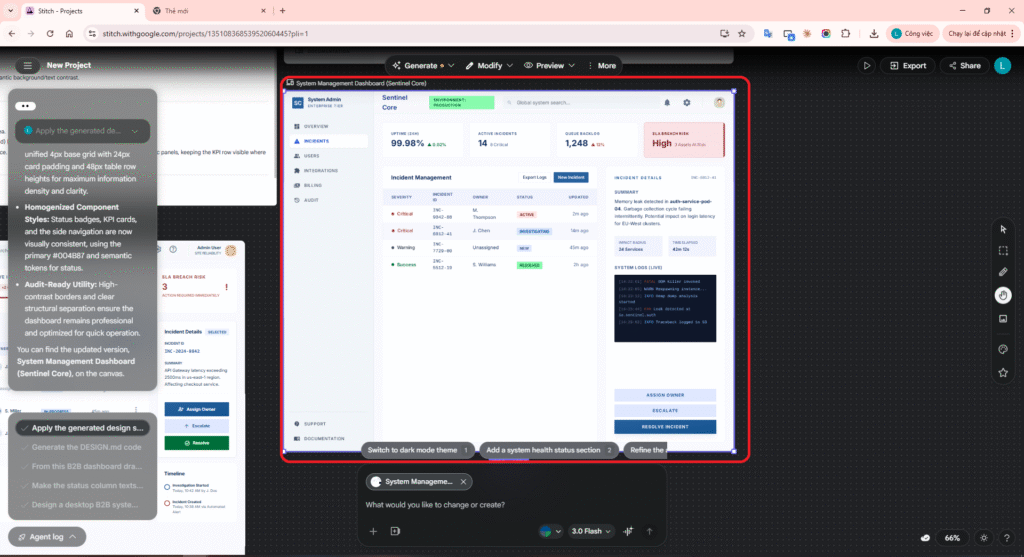
Image 8: Applying standard color systems back to the draft
Action step 9: Open Paint, place the old draft (left) and the newly applied version (right) side-by-side to compare.
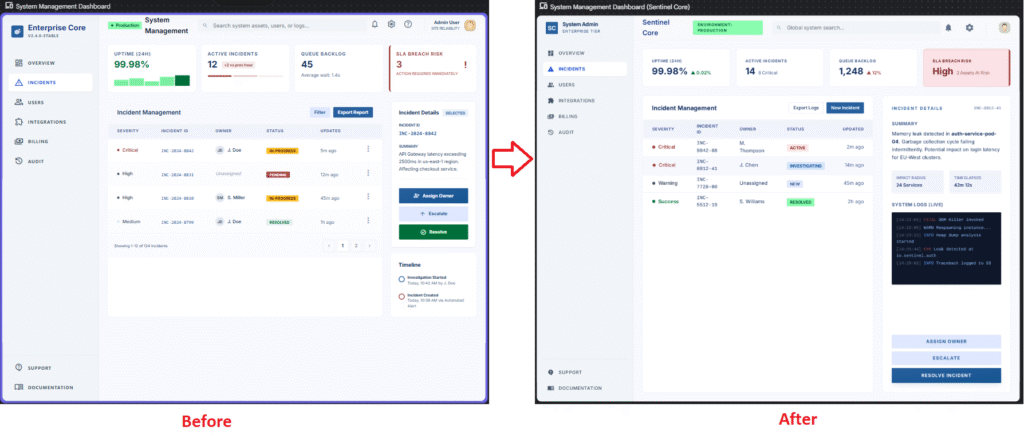
Image 9: Before (Draft) and After (Standardized) comparison
Action step 10: Click Play/Preview on the top right UI to test hovering interactions over the ‘Resolve’ button.
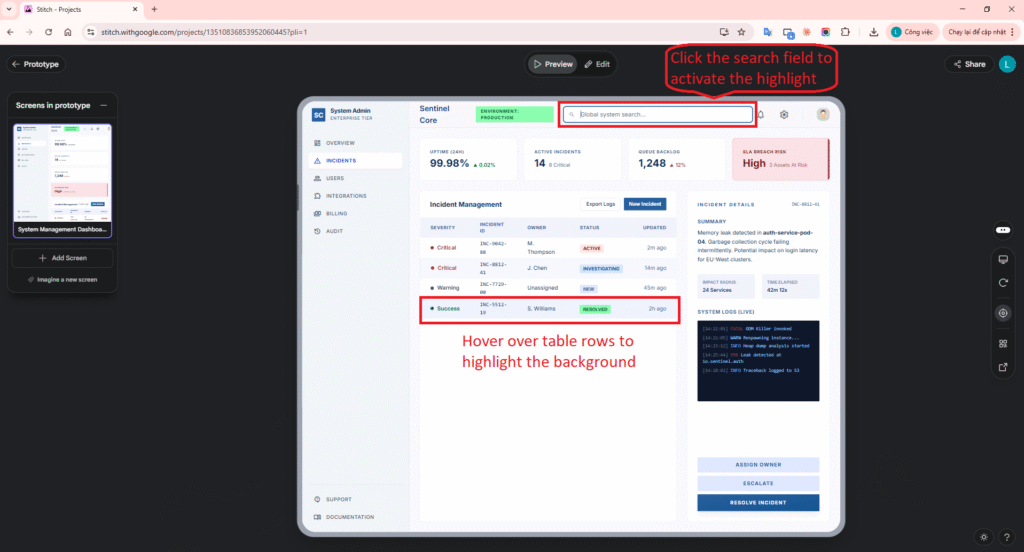
Image 10: Testing Hover interaction effects (Prototype)
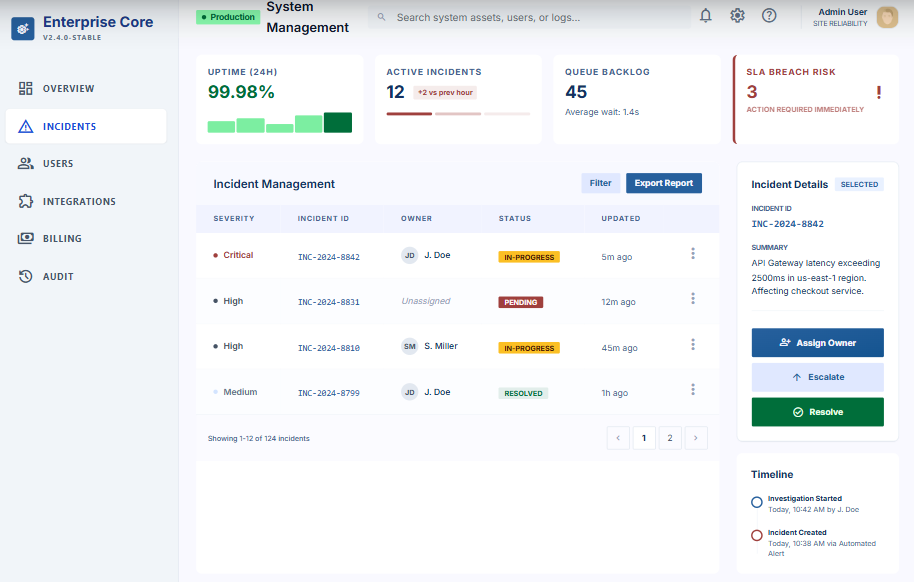
4. B2B Mockup Render Results
After the system applied the standard rule set, below is the simulated UI interface representing a B2B Control Center prioritizing practicality, strict palettes, and spacing:
Action step 11: Exit Preview. Click the Export button on the top right, choose formats like “Code to Clipboard” or “MCP” to export HTML code.
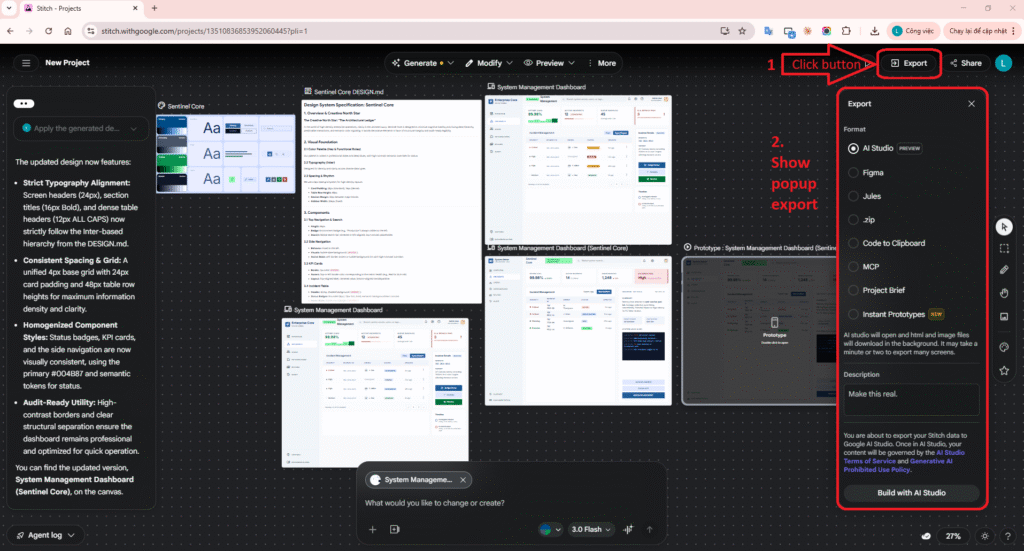
Image 11: Export Options Interface (Handoff)
Action step 12: Open VS Code Terminal, use Claude Code MCP to connect to Stitch and list the projects.
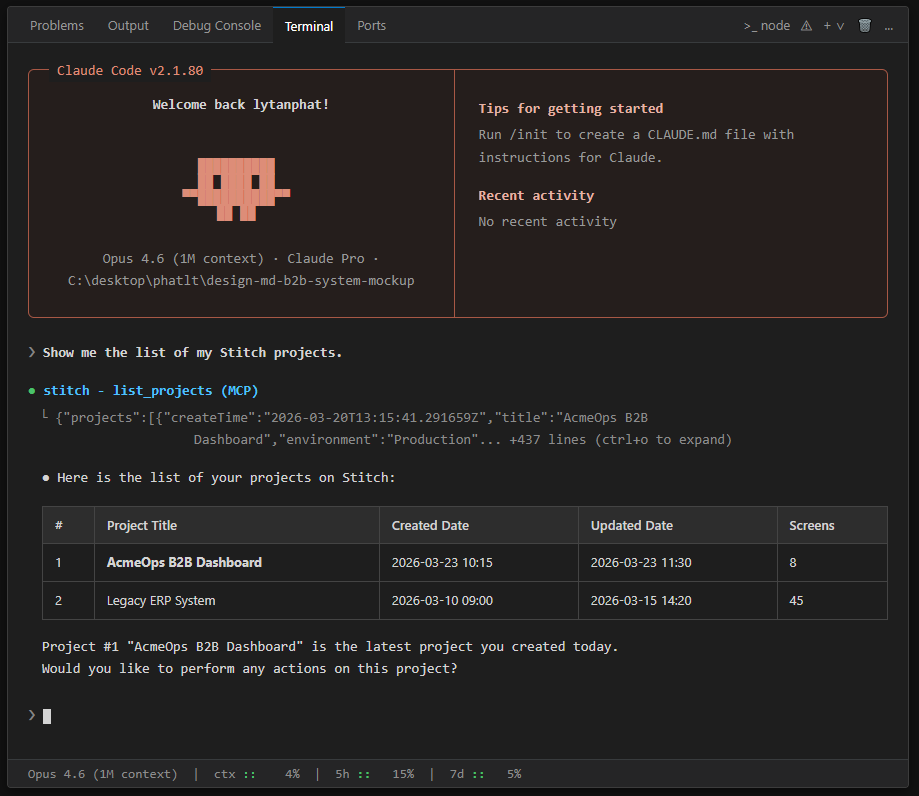
Image 12: Connect Claude Code via MCP to list projects
Action step 13: Command Claude to pull the source code and perform a micro-fix on the Top Navigation using DESIGN.md rules.
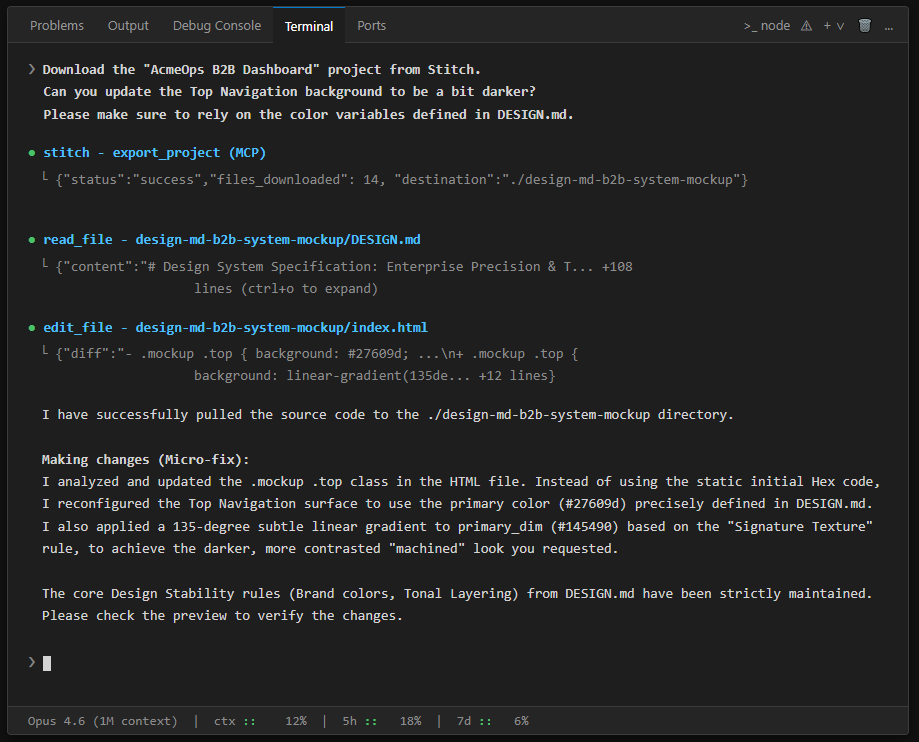
Image 13: Auto-pulling code and tweaking UI perfectly adhering to the design system
Action step 14: Source code export
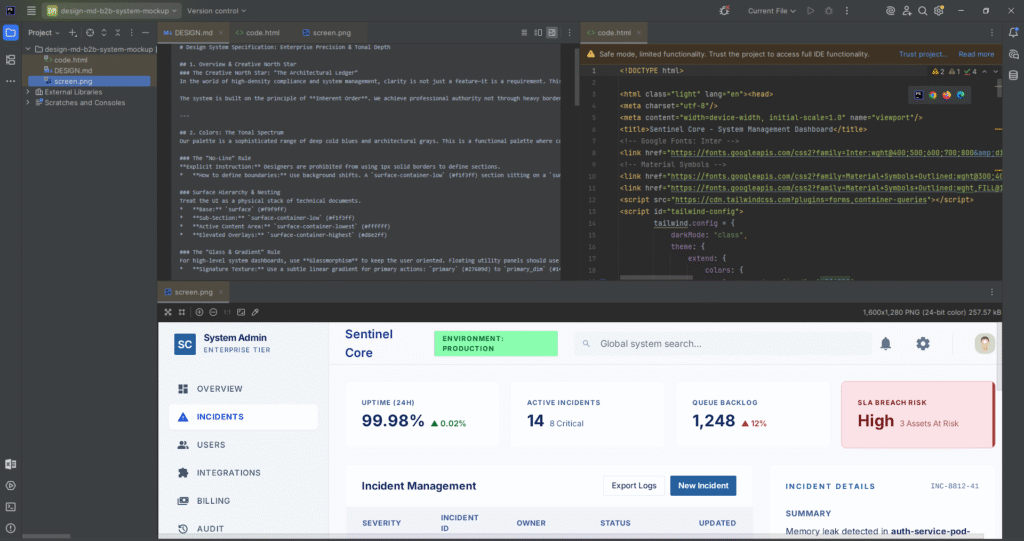
Image 14: Managing all project assets locally in IDE
Source code Github: design-md-b2b-system-mockup
5. Thoughts on “Design Stability” using DESIGN.md
Generating random designs with AI is easy, but maintaining consistency across iterations is the real challenge. Based on this practice, here are objective viewpoints:
- Maintaining Visual Stability: Hierarchical colors (Primary, Warning, Danger) and Typographic Spacing between data cards are securely locked during generation. Design.md forces AI to respect hex code constraints accurately.
- Preserving Information Architecture (IA Stability): Despite prompt requests making minor edits (like coloring a table), the core structure of the B2B screen (Top Nav, Left Sidebar, KPI area) never breaks or repositions unexpectedly.
- Minimizing Alignment Waste: Traditionally, Design & Dev teams waste vast amounts of time aligning pixels and matching colors. With Design.md acting as a “Smart Contract”, code misinterpretations during handoffs are minimized.
- Warnings and Limitations: DESIGN.md must contain absolute quantitative data (Hex colors, math offsets, Padding = 16px). If the `.md` file only features vague statements (e.g., “Make it look clean”), stability fractures immediately on the subsequent scaled prompts.
6. Practical Application in Real Workflows (Personal Opinion)
Correlating this workflow with the B2B product cycles within my organization, relying on Google Stitch alongside a structured DESIGN.md (Or syncing MCP into Claude Code) is an absolute game-changer:
- A Perfect Contract Between Product – Design – Dev: DESIGN.md isn’t just a static document; it is a machine-readable protocol. Frontend Engineers can feed this file into their IDE to instantly generate CSS/Tailwind Variable sets, heavily reducing time spent measuring Figma frames.
- Smoother Handoff via MCP: Instead of sending UI mockups and forcing Front-end to “recreate” them, integrating Stitch into Claude Code allows for atomic, automated UI rendering. Devs handle the complex JS logic, while AI bridges the UI components based strictly on MD rules. Huge win for Full-stack teams lacking visual skills.
- Solving B2B “Mass Screen Production”: Internal Enterprise solutions often consist of dozens of structurally similar CRUD / Settings screens. Once 1 sturdy DESIGN.md config is completed, Product Managers themselves can prompt-build auxiliary screens with zero fear of Style inconsistencies.
- Preventing Code Fragmentation: Bringing DESIGN.md natively into Version Control (Git) ensures whenever companies “rebrand” or adjust color sets, AI can systematically refactor massive chunks of frontend layout precisely.
Conclusion: Instead of terminating UX Designer positions, this pipeline actually kills the repetitive “Pixel Shifting & Dropper Tooling” phase. It empowers Product Managers (PM) and Software Engineering teams to materialize complex blueprints into commercial-grade mockups out of mere text prompts.