1. Introduction
In our previous blog, we explored the fundamentals of Power Apps, focusing on its capabilities, benefits, and role in empowering organizations to build custom applications without extensive coding knowledge. Today, we take the next step on this journey: learning how to build your first app using Power Apps within Dynamics 365 (D365).
Power Apps, when integrated with Dynamics 365, allows users to access data stored in their D365 environment, creating powerful apps that improve workflows and streamline business processes. In this guide, you’ll learn how to set up Power Apps, design an application, and connect it to Dynamics 365 data — all within a few simple steps.
By the end of this article, you’ll have a functional app built from scratch, capable of accessing and managing your Dynamics 365 data, such as customers, leads, or opportunities.
2. Setting Up Your Environment
Before diving into building your app, it’s essential to set up the right environment. Power Apps integrates directly with Dynamics 365, making it easy to pull in your organization’s data and automate processes. Here’s how to get started:
a. Access Power Apps and Dynamics 365
- If you’re already using Dynamics 365, you have access to Power Apps as part of the Microsoft Power Platform. Start by navigating to Power Apps or accessing it through your Office 365 app launcher.
- Ensure you have the necessary permissions to create apps within your organization’s D365 environment. This may require obtaining a Power Apps or Dynamics 365 license if you don’t already have one.
b. Set Up a New App Environment
- Once inside Power Apps, select Create from the left-hand navigation panel.
- You’ll be prompted to choose an app type. For this tutorial, we’ll focus on Canvas Apps, which allow you to design your app from scratch using a drag-and-drop interface.
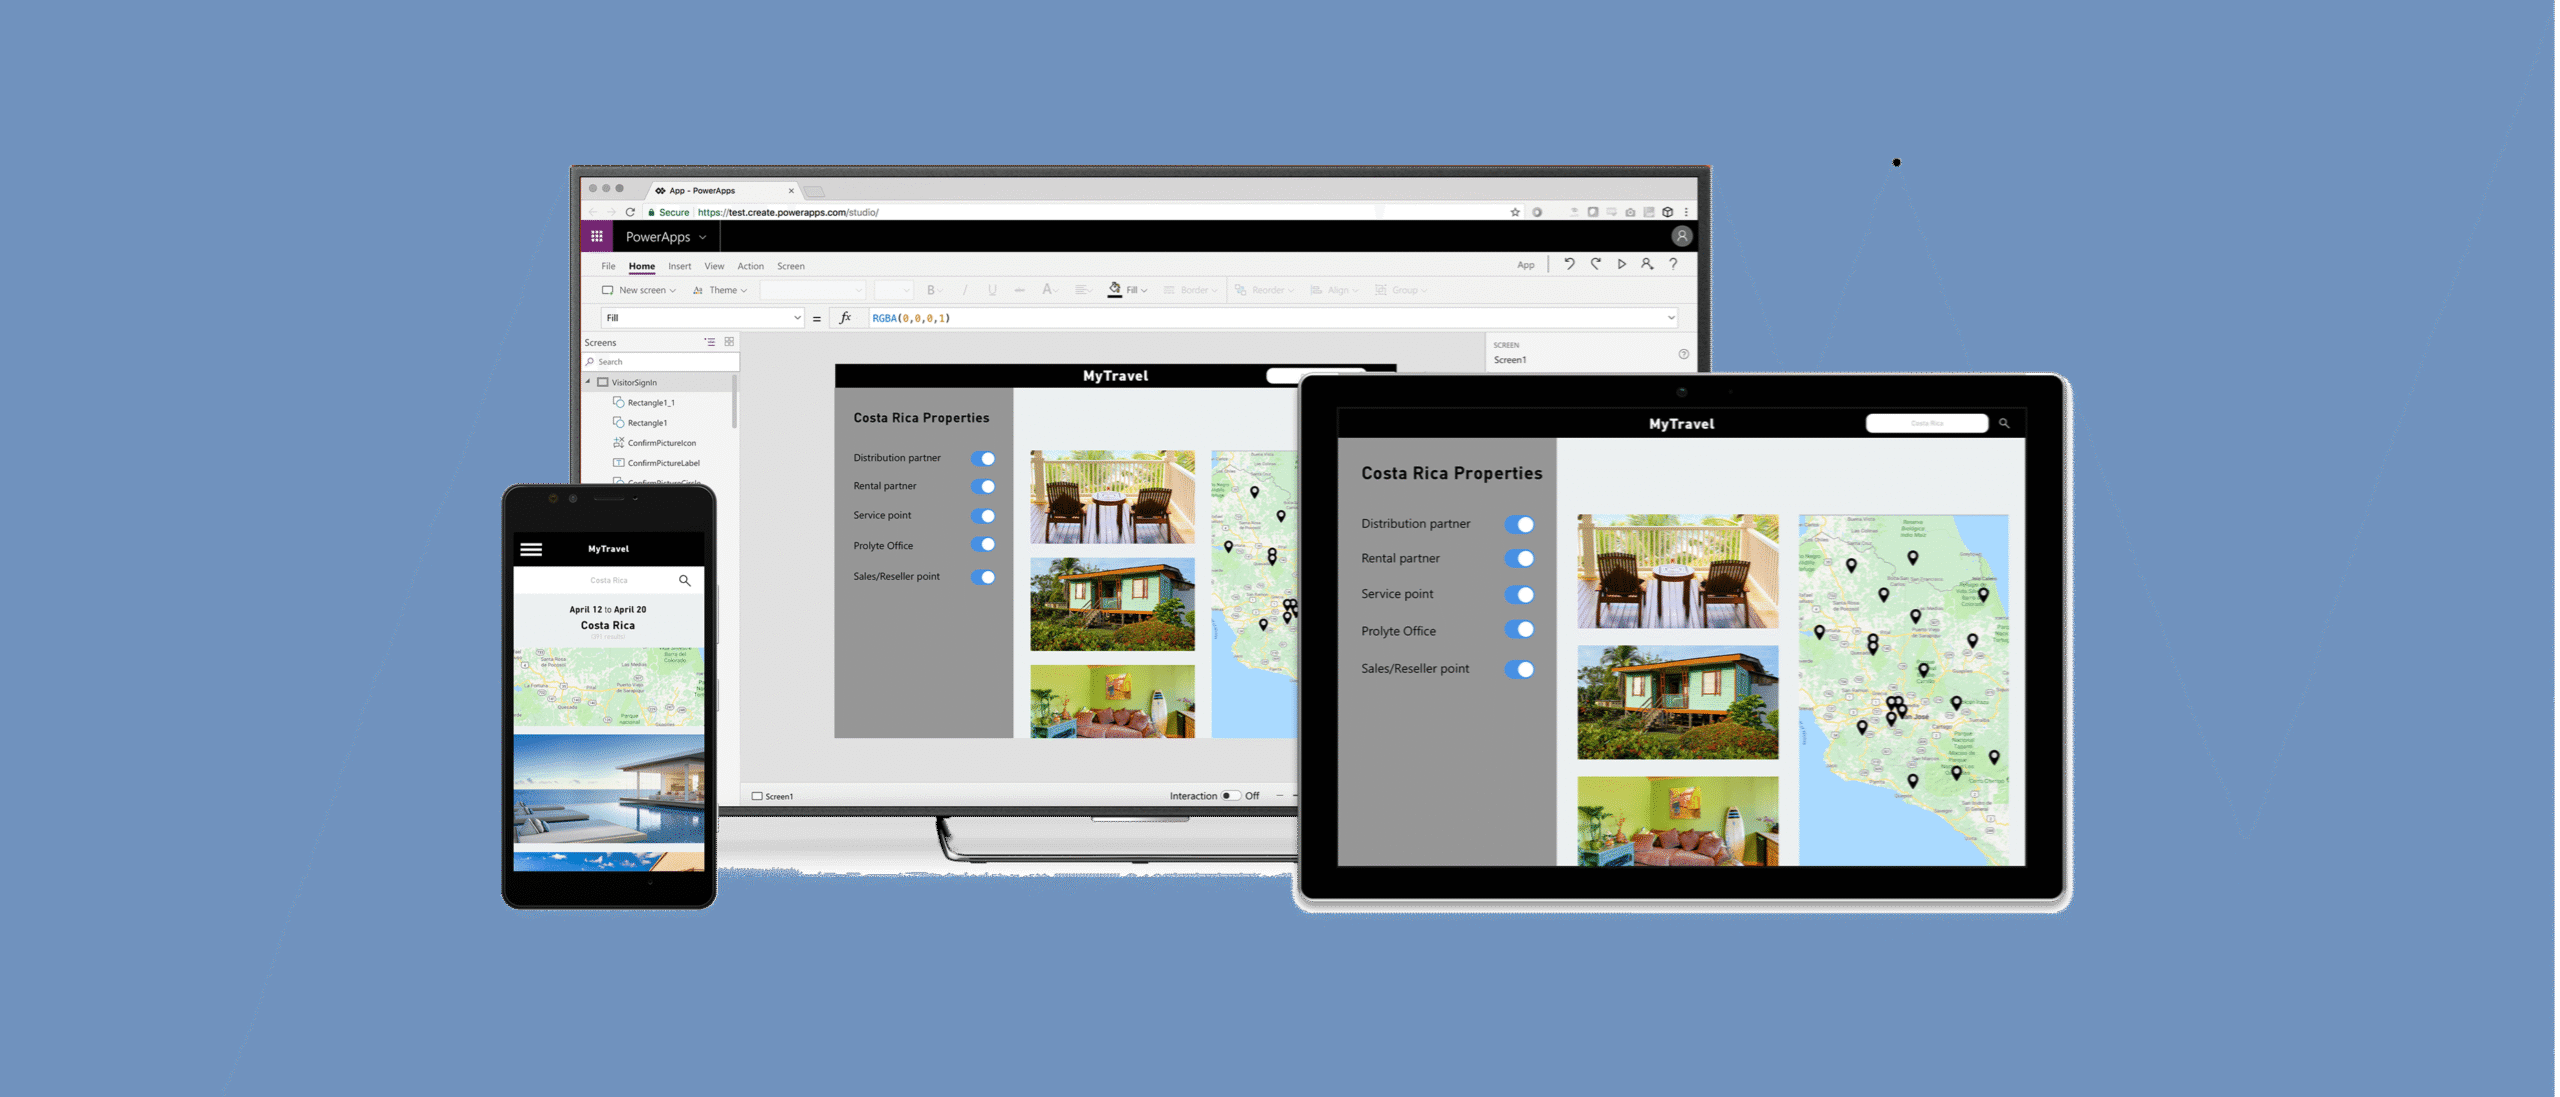
- Name your app and select the format (either Tablet or Phone, depending on your target audience and use case).
c. Connecting to Dynamics 365
- One of the strengths of Power Apps is its ability to integrate directly with your D365 data. To connect your app to D365, select Add Data in the Data panel on the right side of your screen.
- From the list of connectors, choose Dynamics 365 and sign in using your organization’s credentials.
- You’ll now have access to a variety of entities from D365, such as Accounts, Leads, and Opportunities. These entities will form the data backbone of your app.
d. Understanding Connectors
- Connectors are the key to unlocking the data within your Dynamics 365 environment. These allow Power Apps to communicate with other services and applications, such as SharePoint, Microsoft Teams, or even third-party services.
- With D365 connected, you can pull in live data, modify records, and build features that directly impact your business operations.
Once your environment is set up and connected, you’re ready to start designing your app! In the next section, we’ll explore how to lay out your app, customize screens, and build the user interface.
3. Designing the App
Now that your environment is set up and connected to Dynamics 365, it’s time to dive into the fun part: designing your app! Power Apps offers a highly flexible canvas where you can drag and drop components to create an intuitive user experience. In this section, we’ll walk through the basic steps to design your app layout, customize screens, and integrate D365 data.
a. Choosing Your App Type: Canvas vs. Model-Driven Apps
Before starting, it’s important to understand the two main types of apps you can build in Power Apps:
- Canvas Apps: Offer complete flexibility in terms of design, allowing you to build apps from a blank canvas. You control every element of the UI, including where buttons, forms, and galleries are placed.
- Model-Driven Apps: These are built based on your data model and business processes. The layout is predefined but optimized for creating apps quickly using D365 entities.
For this guide, we will focus on Canvas Apps, which provide maximum flexibility when it comes to designing the user interface.
b. Creating a Canvas App
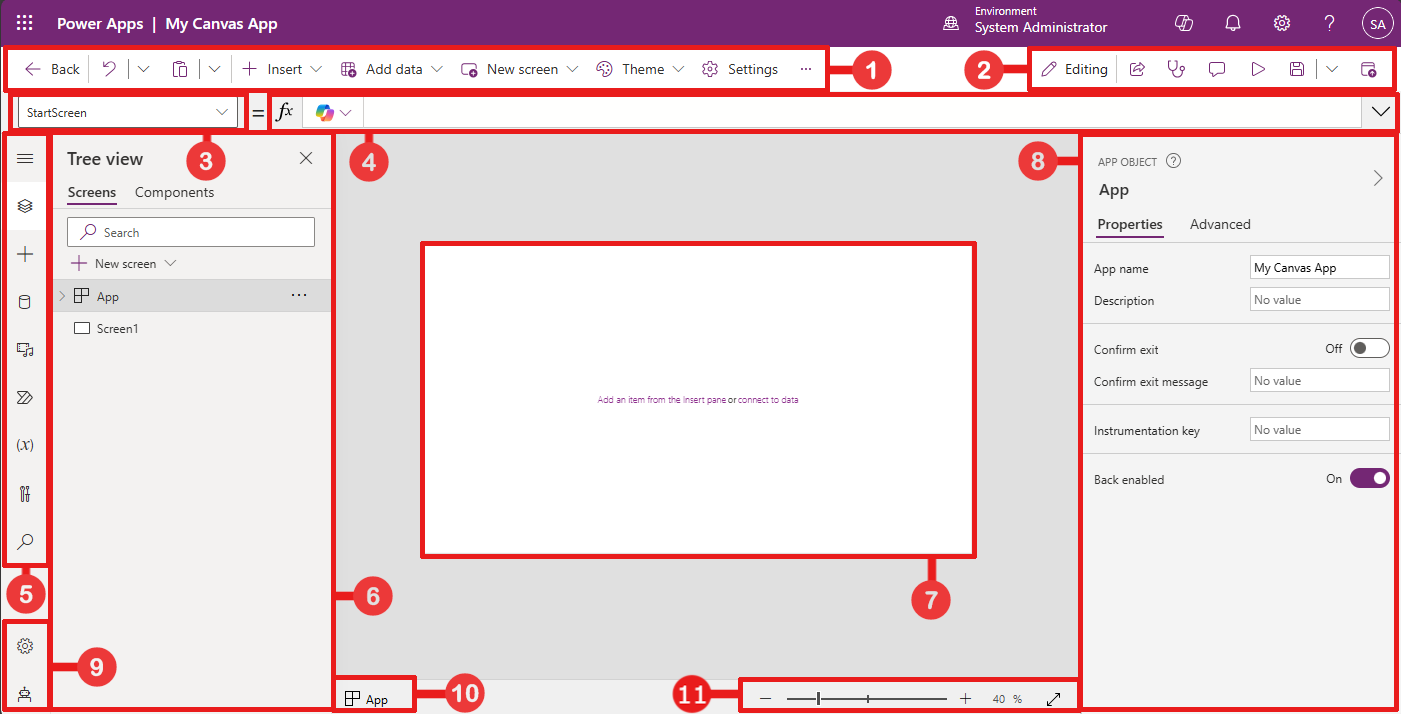
- After selecting Canvas App during the setup, you will enter the app design studio. The blank screen you see is your canvas, where you’ll place controls like buttons, galleries, and forms.
- Begin by adding a screen. In the left-hand pane, click on the “+” icon and select Screen. This will be the main page of your app. You can choose from several templates (e.g., List Screen, Form Screen) or start with a blank screen.
c. Adding Data Sources
- To display or manipulate data from Dynamics 365, you’ll need to add data sources. If you haven’t already, click on the Data tab in the right-hand panel, select Add Data, and connect your app to your D365 entities (e.g., Accounts, Contacts, Leads).
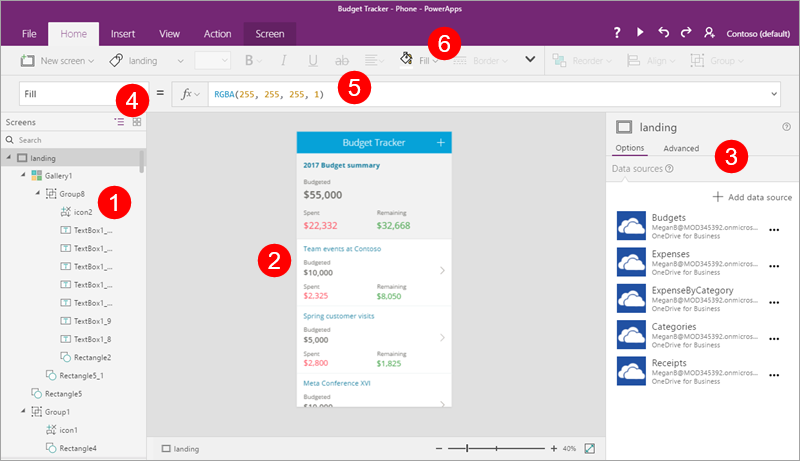
- Once the data source is added, you can start using these entities within your app. For example, if you want to show a list of leads, use a Gallery control.
- Go to the Insert menu, click Gallery, and choose the layout you prefer (Vertical, Horizontal, etc.).
- In the gallery’s data property, bind it to the D365 entity (e.g., Leads). Power Apps will automatically pull in the relevant data fields, such as names, email addresses, or statuses.
d. Customizing the User Interface
- Customization is where Canvas Apps really shine. You can drag and drop components like buttons, text fields, and forms onto your canvas and arrange them however you like.
- Want to add a button to navigate to a new screen? Go to Insert, select Button, and drag it onto the screen. You can adjust its properties, like color and size, in the right-hand properties pane.
- To make the button functional, add a simple action using PowerFX (the formula language in Power Apps). For example, to navigate to another screen, select the button and enter the formula Navigate(Screen2).
e. Creating Forms to Manage Data
- Forms are essential if you want to allow users to view or modify D365 data within the app. To add a form, go to Insert, choose Form, and select either an Edit Form (for editing data) or View Form (for read-only data).
- Connect the form to the data source by selecting your D365 entity (e.g., Opportunities).
- You can choose which fields from the entity you want to display and customize the layout, such as adding dropdowns, text inputs, or checkboxes. This allows users to interact with D365 data directly from your app.
With your app’s design taking shape, the next step is to work with the data, ensuring it’s properly displayed and functional within your app. In the following section, we’ll focus on how to manage D365 data, including how to display, add, and edit records.
4. Working with Data
Now that your app’s layout is coming together, it’s time to focus on one of the most critical aspects of any application: data. In this section, we’ll walk through how to work with Dynamics 365 data in your app. You’ll learn how to display data, allow users to add or edit records, and ensure data integrity.
a. Displaying Data in Galleries and Forms
- Galleries and forms are the two primary ways to display and interact with data in Power Apps.
- Galleries are great for showing lists of items. If you’ve already connected your app to a D365 entity (e.g., Leads or Accounts), you can bind the gallery to the data source.
- To do this, select your gallery, go to the Items property in the formula bar, and enter the name of your data source. For example, Leads.
- The gallery will automatically display the data fields (e.g., Lead Name, Email Address) from the entity. You can customize the layout to show only the fields you want by selecting the gallery and modifying its data cards.
- Forms allow users to view, edit, or create records. There are two main types of forms:
- View Form: Displays data in read-only mode.
- Edit Form: Allows users to modify existing records or create new ones.
b. Binding Forms to Data
- To bind a form to a data source, first insert a form from the Insert menu and choose either View Form or Edit Form.
- In the right-hand Data Source panel, choose your D365 entity (e.g., Opportunities) as the data source.
- You can then customize the fields that appear in the form. Click on the form, and under the Fields panel, select the columns you want users to see or edit. This flexibility lets you tailor forms to fit specific business processes or user needs.
c. Creating New Records
- Allowing users to create new records from within the app is simple with the Edit Form control.
- Add a button labeled “New Record” and set its OnSelect property to this formula: NewForm(EditForm1). This resets the form, enabling users to input new data.
- Once the form is filled out, another button (e.g., “Submit”) should be added. Set this button’s OnSelect property to SubmitForm(EditForm1). When clicked, this action will save the new record directly to the D365 entity.
d. Editing Existing Records
- To edit existing records, you need to set up a way for the user to select a record from the gallery and populate the form with its details.
- To do this, add a button in the gallery item that lets users click and view record details. Set the button’s OnSelect property to EditForm(EditForm1); Navigate(FormScreen), where FormScreen is the screen displaying the form.
- The form will then load the selected record, allowing users to edit and submit changes.
e. Adding Simple Validation
- Power Apps allows you to add simple validation to forms, ensuring data integrity. For instance, if you want to ensure a required field (like a customer name) is filled out, you can set validation rules.
- Select the field in your form, go to the Advanced properties, and find the Required option. Set it to true. If a user tries to submit the form without filling in that field, they’ll see an error message.
- You can also set up custom validation logic using PowerFX. For example, to ensure that an email address follows a valid format, you could use a formula like IsMatch(EmailInput.Text, “^[a-zA-Z0-9+_.-]+@[a-zA-Z0-9.-]+$”).
With the ability to view, add, and edit records now set up, your app becomes a powerful tool for working with real-time data from Dynamics 365. In the next section, we’ll explore adding automation and workflows to enhance your app’s functionality.
5. Adding Logic and Automation
With your app now displaying and interacting with Dynamics 365 data, it’s time to enhance its functionality by adding logic and automation. Power Apps, in combination with Power Automate, enables you to build workflows that respond to specific events, such as sending notifications, automating tasks, or even updating records in D365 without manual input. This section will guide you through adding logic to your app and creating a simple workflow using Power Automate.
a. Introduction to Power Automate
- Power Automate (formerly Microsoft Flow) is a tool that allows you to automate workflows between your applications and services. When integrated with Power Apps, it can handle complex tasks like triggering an email, updating D365 records, or syncing data between systems — all without requiring user intervention.
- You can easily embed Power Automate flows in your Power Apps to enhance your app’s capabilities.
b. Adding Business Logic with PowerFX
- PowerFX is the formula language used in Power Apps to handle simple logic. For example, you can control how data is displayed or define actions when users click a button.
Example: If you want to show a confirmation message when a record is successfully submitted, use this formula in the OnSuccess property of the form:
PowerFX
Notify(“Record submitted successfully!”, NotificationType.Success);
You can also create more complex logic, like filtering data dynamically. For example, to display only active leads from your D365 Leads entity in a gallery, you can use the following formula in the Items property:
PowerFX
Filter(Leads, Status = “Active”);
c. Creating a Simple Workflow with Power Automate
- Let’s add some automation to your app using Power Automate. For this example, we’ll create a workflow that sends an email notification when a new record is created in Dynamics 365.
Steps to Create a Flow:
- Open Power Automate: In Power Apps, go to the Action menu and select Power Automate. You’ll be redirected to the Power Automate portal.
- Create a New Flow: Click on Create, and select Automated Flow. Choose a trigger that suits your needs — for this example, select When a record is created (triggered by a new record in D365).
- Select the Entity: Choose the D365 entity you’re working with (e.g., Leads or Accounts). Every time a new record is added to this entity, the flow will trigger.
- Add Actions: Add an action to the flow, such as Send an email. Configure the email content, including recipients and the message body, which can include details from the new D365 record.
- Test the Flow: Once the flow is complete, save it and test the automation by adding a new record to the D365 entity through your app. The flow should automatically send an email.
d. Integrating Power Automate Flows in Power Apps
- After creating a flow in Power Automate, you can easily integrate it into your app. In Power Apps, go back to your app and open the screen or button where you want the automation to trigger.
In the button’s OnSelect property, use the Power Automate option to call the flow you created. For example:
‘YourFlowName’.Run(LeadName.Text, LeadEmail.Text);
- This connects your app to the automated workflow, ensuring the logic you’ve set up in Power Automate runs whenever the button is clicked or a certain action occurs.
e. Advanced Automation
- Once you’re comfortable with basic workflows, you can explore more advanced scenarios like:
- Updating records across multiple systems when certain conditions are met.
- Triggering flows based on complex events or multi-step approvals.
- Integrating AI models or external APIs to add intelligence to your app.
With automation now integrated into your app, you’ve taken a significant step toward creating a more dynamic and efficient tool for your users. In the next section, we’ll cover how to test and publish your app so that others in your organization can start using it.
6. Testing and Publishing the App
Now that your app is designed and enhanced with automation and business logic, it’s important to thoroughly test the app before releasing it to your organization. Testing ensures that the app works as expected and catches any potential issues before users interact with it. Once testing is complete, you can publish the app and make it available to your team.
a. Testing the App
- Preview Mode: Power Apps offers a preview mode that allows you to test the app in real time.
- Click the Play button in the top-right corner of the screen to enter preview mode. This simulates how the app will behave on different devices.
- Interact with the app by navigating through screens, submitting forms, and triggering automated workflows to ensure everything works as expected.
- Testing Data Interactions:
- Verify that all data bindings are correctly configured by interacting with the data you’ve pulled from Dynamics 365.
- Ensure that galleries display the correct data, forms allow users to submit and update records, and that any automated workflows, such as email notifications, are working properly.
- Double-check that validation rules (e.g., required fields) are functioning as intended.
- Testing Automation:
- Test any Power Automate flows you’ve integrated. For example, if you’ve set up an email notification when a new record is created, verify that the flow runs successfully when you add a new record through the app.
- You can view the flow history in Power Automate to confirm that it has triggered as expected.
- Debugging Common Issues:
- Data not displaying: If your app isn’t showing data correctly, verify that the data source is properly connected and that the correct entity is selected.
- Form submission errors: Ensure all required fields are filled out and that the form is properly connected to the data source.
- Automation not triggering: Check Power Automate to ensure the flow is correctly set up and linked to your app’s triggers.
b. Publishing the App
Once you’re satisfied with your testing, you can publish the app for your organization. Here’s how:
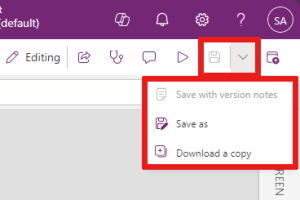
- Save and Publish:
- Click the File menu and select Save to ensure your app is up to date.
- After saving, select Publish to the web. This will make your app available to users within your organization.
- Sharing the App:
- After publishing, go to the Share option in the left-hand menu.
- You can invite specific users or groups to access the app by entering their email addresses.
- Define the permissions for each user (e.g., whether they can edit the app or only view it).
- Testing on Devices:
- Power Apps automatically adapts apps to different devices, such as phones and tablets. However, it’s a good idea to test the app on different devices to ensure that the layout is responsive and works well across platforms.
- You can test the app directly on mobile devices by downloading the Power Apps mobile app from the Apple App Store or Google Play Store, logging in, and accessing your published app.
c. Updating the App After Publishing
- Apps in Power Apps can be continuously improved. If you need to make changes after publishing, simply go back into the app editor, make your updates, and republish.
- Users will receive the latest version of the app without needing to reinstall or manually update it