Fine-Tuning GPT-OSS-20B on Google Colab Using Unsloth and LoRA

1. Introduction

In today’s rapidly advancing field of AI, the use of AI models — or more specifically, running them on personal computers — has become more common than ever.
However, some AI models have become increasingly difficult to use because the training data required for them is massive, often involving millions of parameters.
This makes it nearly impossible for low-end computers to use them effectively for work or projects.

Therefore, in this article, we will explore Google Colab together with Unsloth’s fine-tuning tool, combined with LoRA, to fine-tune and use gpt-oss-20b according to our own needs.


2. Main Content

a. What is Unsloth?

  • Unsloth is a modern Python library designed to speed up and optimize the fine-tuning of large language models (LLMs) such as LLaMA, Mistral, Mixtral, and others.
    It makes model training and fine-tuning extremely fast, memory-efficient, and easy — even on limited hardware like a single GPU or consumer-grade machines.

b. What is Colab?

  • Colab is a hosted Jupyter Notebook service that requires no setup and provides free access to computing resources, including GPUs and TPUs.
    It is particularly well-suited for machine learning, data science, and education purposes.

c. What is LoRA?

  • Low-Rank Adaptation (LoRA) is a technique for quickly adapting machine learning models to new contexts.
    LoRA helps make large and complex models more suitable for specific tasks. It works by adding lightweight layers to the original model rather than modifying the entire architecture.
    This allows developers to quickly expand and specialize machine learning models for various applications.

3. Using Colab to Train gpt-oss-20b

– Installing the Libraries

!pip install --upgrade -qqq uv

try:
    import numpy
    install_numpy = f"numpy=={numpy.__version__}"
except:
    install_numpy = "numpy"

!uv pip install -qqq \
  "torch>=2.8.0" "triton>=3.4.0" {install_numpy} \
  "unsloth_zoo[base] @ git+https://github.com/unslothai/unsloth-zoo" \
  "unsloth[base] @ git+https://github.com/unslothai/unsloth" \
  torchvision bitsandbytes \
  git+https://github.com/huggingface/[email protected] \
  git+https://github.com/triton-lang/triton.git@05b2c186c1b6c9a08375389d5efe9cb4c401c075#subdirectory=python/triton_kernels

– After completing the installation, load the gpt-oss-20b model from Unsloth:

from unsloth import FastLanguageModel
import torch

max_seq_length = 1024
dtype = None
model_name = "unsloth/gpt-oss-20b"

model, tokenizer = FastLanguageModel.from_pretrained(
    model_name = model_name,
    dtype = dtype,                 # None for auto detection
    max_seq_length = max_seq_length,  # Choose any for long context!
    load_in_4bit = True,           # 4 bit quantization to reduce memory
    full_finetuning = False,       # [NEW!] We have full finetuning now!
    # token = "hf_...",            # use one if using gated models
)
Colab install output

– Adding LoRA for Fine-Tuning

model = FastLanguageModel.get_peft_model(
    model,
    r = 8,  # Choose any number > 0! Suggested 8, 16, 32, 64, 128
    target_modules = ["q_proj", "k_proj", "v_proj", "o_proj",
                      "gate_proj", "up_proj", "down_proj"],
    lora_alpha = 16,
    lora_dropout = 0,              # Optimized fast path
    bias = "none",                 # Optimized fast path
    # "unsloth" uses less VRAM, fits larger batches
    use_gradient_checkpointing = "unsloth",  # True or "unsloth" for very long context
    random_state = 3407,
    use_rslora = False,
    loftq_config = None,
)
Tip: If you hit out-of-memory (OOM), reduce max_seq_length, set a smaller r, or increase gradient_accumulation_steps.

– Testing the Model Before Fine-Tuning

Now, let’s test how the model responds before fine-tuning:

messages = [
    {"role": "system", "content": "Bạn là Shark B, một nhà đầu tư nổi tiếng, thẳng thắn và thực tế", "thinking": None},
    {"role": "user", "content": "Bạn hãy giới thiệu bản thân"},
]

inputs = tokenizer.apply_chat_template(
    messages,
    add_generation_prompt = True,
    return_tensors = "pt",
    return_dict = True,
    reasoning_effort = "low",
).to(model.device)

from transformers import TextStreamer
_ = model.generate(**inputs, max_new_tokens = 512, streamer = TextStreamer(tokenizer))
Generation preview

– Load data for finetune model

Dataset sample

Dataset preview
def formatting_prompts_func(examples):
    convos = examples["messages"]
    texts = [tokenizer.apply_chat_template(convo, tokenize = False, add_generation_prompt = False) for convo in convos]
    return { "text" : texts, }

from datasets import load_dataset
dataset = load_dataset("json", data_files="data.jsonl", split="train")
dataset
from unsloth.chat_templates import standardize_sharegpt
dataset = standardize_sharegpt(dataset)
dataset = dataset.map(formatting_prompts_func, batched = True)

– Train model

The following code snippet defines the configuration and setup for the fine-tuning process.
Here, we use SFTTrainer and SFTConfig from the trl library to perform Supervised Fine-Tuning (SFT) on our model.
The configuration specifies parameters such as batch size, learning rate, optimizer type, and number of training epochs.

from trl import SFTConfig, SFTTrainer

trainer = SFTTrainer(
    model = model,
    tokenizer = tokenizer,
    train_dataset = dataset,
    args = SFTConfig(
        per_device_train_batch_size = 1,
        gradient_accumulation_steps = 4,
        warmup_steps = 5,
        num_train_epochs = 1,  # Set this for 1 full training run.
        # max_steps = 30,
        learning_rate = 2e-4,
        logging_steps = 1,
        optim = "adamw_8bit",
        weight_decay = 0.01,
        lr_scheduler_type = "linear",
        seed = 3407,
        output_dir = "outputs",
        report_to = "none",  # Use this for WandB etc.
    ),
)

trainer_stats = trainer.train()

– After training, try the fine-tuned model

# Example reload (set to True to run)
if False:
    from unsloth import FastLanguageModel
    model, tokenizer = FastLanguageModel.from_pretrained(
        model_name = "finetuned_model",  # YOUR MODEL YOU USED FOR TRAINING
        max_seq_length = 1024,
        dtype = None,
        load_in_4bit = True,
    )

    messages = [
        {"role": "system", "content": "Bạn là Shark B, một nhà đầu tư nổi tiếng, thẳng thắn và thực tế", "thinking": None},
        {"role": "user", "content": "Bạn hãy giới thiệu bản thân"},
    ]

    inputs = tokenizer.apply_chat_template(
        messages,
        add_generation_prompt = True,
        return_tensors = "pt",
        return_dict = True,
        reasoning_effort = "low",
    ).to(model.device)

    from transformers import TextStreamer
    _ = model.generate(**inputs, max_new_tokens = 512, streamer = TextStreamer(tokenizer))
Note: Replace finetuned_model with your actual model path (e.g., outputs or the directory you saved/merged adapters to).

Colab notebook: Open your Colab here.


4. Conclusion & Next Steps

By combining Unsloth (for speed and memory efficiency), LoRA (for lightweight adaptation), and Google Colab (for accessible compute), you can fine-tune gpt-oss-20b even on modest hardware. The workflow above helps you:

  • Install a reproducible environment with optimized kernels.
  • Load gpt-oss-20b in 4-bit to reduce VRAM usage.
  • Attach LoRA adapters to train only a small set of parameters.
  • Prepare chat-style datasets and run supervised fine-tuning with TRL’s SFTTrainer.
  • Evaluate before/after to confirm your improvements.
Open the Colab
Clone the notebook, plug in your dataset, and fine-tune your own assistant in minutes.

Codex CLI vs Gemini CLI vs Claude Code

1. Codex CLI – Capabilities and New Features

According to OpenAI’s official announcement (“Introducing upgrades to Codex”), Codex CLI has been rebuilt on top of GPT-5-Codex, turning it into an agentic programming assistant — a developer AI that can autonomously plan, reason, and execute tasks across coding environments.

🌟 Core Abilities

  • Handles both small and large tasks: From writing a single function to refactoring entire projects.
  • Cross-platform integration: Works seamlessly across terminal (CLI), IDE (extension), and cloud environments.
  • Task reasoning and autonomy: Can track progress, decompose goals, and manage multi-step operations independently.
  • Secure by design: Runs in a sandbox with explicit permission requests for risky operations.

📈 Performance Highlights

  • Uses 93.7% fewer reasoning tokens for simple tasks, but invests 2× more computation on complex ones.
  • Successfully ran over 7 hours autonomously on long software tasks during testing.
  • Produces more precise code reviews than older Codex versions.

🟢 In short: Codex CLI 2025 is not just a code generator — it’s an intelligent coding agent capable of reasoning, multitasking, and working securely across terminal, IDE, and cloud environments.

2.Codex CLI vs Gemini CLI vs Claude Code: The New Era of AI in the Terminal

The command line has quietly become the next frontier for artificial intelligence.
While graphical AI tools dominate headlines, the real evolution is unfolding inside the terminal — where AI coding assistants now operate directly beside you, as part of your shell workflow.

Three major players define this new space: Codex CLI, Gemini CLI, and Claude Code.
Each represents a different philosophy of how AI should collaborate with developers — from speed and connectivity to reasoning depth. Let’s break down what makes each contender unique, and where they shine.


🧩 Codex CLI — OpenAI’s Code-Focused Terminal Companion

Codex CLI acts as a conversational layer over your terminal.
It listens to natural language commands, interprets your intent, and translates it into executable code or shell operations.
Now powered by OpenAI’s Codex5-Medium, it builds on the strengths of the o4-mini generation while adding adaptive reasoning and a larger 256K-token context window.

Once installed, Codex CLI integrates seamlessly with your local filesystem.
You can type:

“Create a Python script that fetches GitHub issues and logs them daily,”
and watch it instantly scaffold the files, import the right modules, and generate functional code.

Codex CLI supports multiple languages — Python, JavaScript, Go, Rust, and more — and is particularly strong at rapid prototyping and bug fixing.
Its defining trait is speed: responses feel immediate, making it perfect for fast iteration cycles.

Best for: developers who want quick, high-quality code generation and real-time debugging without leaving the terminal.


🌤️ Gemini CLI — Google’s Adaptive Terminal Intelligence

Gemini CLI embodies Google’s broader vision for connected AI development — blending reasoning, utility, and live data access.
Built on Gemini 2.5 Pro, this CLI isn’t just a coding bot — it’s a true multitool for developers and power users alike.

Beyond writing code, Gemini CLI can run shell commands, retrieve live web data, or interface with Google Cloud services.
It’s ideal for workflows that merge coding with external context — for example:

  • fetching live API responses,

  • monitoring real-time metrics,

  • or updating deployment configurations on-the-fly.

Tight integration with VS Code, Google Cloud SDK, and Workspace tools turns Gemini CLI into a full-spectrum AI companion rather than a mere code generator.

Best for: developers seeking a versatile assistant that combines coding intelligence with live, connected utility inside the terminal.


🧠 Claude Code — Anthropic’s Deep Code Reasoner

If Codex is about speed, and Gemini is about connectivity, Claude Code represents depth.
Built on Claude Sonnet 4.5, Anthropic’s upgraded reasoning model, Claude Code is designed to operate as a true engineering collaborator.

It excels at understanding, refactoring, and maintaining large-scale codebases.
Claude Code can read entire repositories, preserve logic across files, and even generate complete pull requests with human-like commit messages.
Its upgraded 250K-token context window allows it to track dependencies, explain architectural patterns, and ensure code consistency over time.

Claude’s replies are more analytical — often including explanations, design alternatives, and justifications for each change.
It trades a bit of speed for a lot more insight and reliability.

Best for: professional engineers or teams managing complex, multi-file projects that demand reasoning, consistency, and full-codebase awareness.

3.Codex CLI vs Gemini CLI vs Claude Code: Hands-on With Two Real Projects

While benchmarks and specs are useful, nothing beats actually putting AI coding agents to work.
To see how they perform on real, practical front-end tasks, I tested three leading terminal assistants — Codex CLI (Codex5-Medium), Gemini CLI (Gemini 2.5 Pro), and Claude Code (Sonnet 4.5) — by asking each to build two classic web projects using only HTML, CSS, and JavaScript.

  • 🎮 Project 1: Snake Game — canvas-based, pixel-style, smooth movement, responsive.

  • Project 2: Todo App — CRUD features, inline editing, filters, localStorage, dark theme, accessibility + keyboard support.

🎮 Task 1 — Snake Game

Goal

Create a playable 2D Snake Game using HTML, CSS, and JavaScript.
Display a grid-based canvas with a moving snake that grows when it eats food.
The snake should move continuously and respond to arrow-key inputs.
The game ends when the snake hits the wall or itself.
Include a score counter and a restart button with pixel-style graphics and responsive design.

Prompt

Create a playable 2D Snake Game using HTML, CSS, and JavaScript.

  The game should display a grid-based canvas with a moving snake that grows when it eats

  food.

  The snake should move continuously and respond to keyboard arrow keys for direction

  changes.

  The game ends when the snake hits the wall or itself.

  Show a score counter and a restart button.

  Use smooth movement, pixel-style graphics, and responsive design for different screen sizes

Observations

Codex CLI — Generated the basic canvas scaffold in seconds. Game loop, input, and scoring worked out of the box, but it required minor tuning for smoother turning and anti-reverse logic.

Gemini CLI — Delivered well-structured, commented code and used requestAnimationFrame properly. Gameplay worked fine, though the UI looked plain — more functional than fun.

Claude Code — Produced modular, production-ready code with solid collision handling, restart logic, and a polished HUD. Slightly slower response but the most complete result overall.

✅ Task 2 — Todo App

Goal

Build a complete, user-friendly Todo List App using only HTML, CSS, and JavaScript (no frameworks).
Features: add/edit/delete tasks, mark complete/incomplete, filter All / Active / Completed, clear completed, persist via localStorage, live counter, dark responsive UI, and full keyboard accessibility (Enter/Space/Delete).
Deliverables: index.html, style.css, app.js — clean, modular, commented, semantic HTML + ARIA.

Prompt

Develop a complete and user-friendly Todo List App using only HTML, CSS, and JavaScript (no frameworks). The app should include the following functionality and design requirements:

    1. Input field and ‘Add’ button to create new tasks.
    2. Ability to mark tasks as complete/incomplete via checkboxes.
    3. Inline editing of tasks by double-clicking — pressing Enter saves changes and Esc cancels.
    4. Delete buttons to remove tasks individually.
    5. Filter controls for All, Active, and Completed tasks.
    6. A ‘Clear Completed’ button to remove all completed tasks at once.
    7. Automatic saving and loading of todos using localStorage.
    8. A live counter showing the number of active (incomplete) tasks.
    9. A modern, responsive dark theme UI using CSS variables, rounded corners, and hover effects.
    10. Keyboard accessibility — Enter to add, Space to toggle, Delete to remove tasks.
      Ensure the project is well structured with three separate files:
    • index.html
    • style.css
    • app.js
      Code should be clean, modular, and commented, with semantic HTML and appropriate ARIA attributes for accessibility.

Observations

Codex CLI — Created a functional 3-file structure with working CRUD, filters, and persistence. Fast, but accessibility and keyboard flows needed manual reminders.

Gemini CLI — Balanced logic and UI nicely. Used CSS variables for a simple dark theme and implemented localStorage properly.
Performance was impressive — Gemini was the fastest overall, but its default design felt utilitarian, almost as if it “just wanted to get the job done.”
Gemini focuses on correctness and functionality rather than visual finesse.

Claude Code — Implemented inline editing, keyboard shortcuts, ARIA live counters, and semantic roles perfectly. The result was polished, responsive, and highly maintainable.

4.Codex CLI vs Gemini CLI vs Claude Code — Real-World Comparison

When testing AI coding assistants, speed isn’t everything — clarity, structure, and the quality of generated code all matter. To see how today’s top command-line tools compare, I ran the same set of projects across Claude Code, Gemini CLI, and Codex CLI, including a 2D Snake Game and a Todo List App.
Here’s how they performed.


Claude Code: Polished and Reliable

Claude Code consistently produced the most professional and complete results.
Its generated code came with clear structure, organized logic, and well-commented sections.
In the Snake Game test, Claude built the best-looking user interface, with a balanced layout, responsive design, and smooth movement logic.
Error handling was handled cleanly, and the overall experience felt refined — something you could hand over to a production team with confidence.
Although it wasn’t the fastest, Claude made up for it with code quality, structure, and ease of prompt engineering.
If your workflow values polish, maintainability, and readability, Claude Code is the most dependable choice.


Gemini CLI: Fastest but Basic

Gemini CLI clearly took the top spot for speed.
It executed quickly, generated files almost instantly, and made iteration cycles shorter.
However, the output itself felt minimal and unrefined — both the UI and the underlying logic were quite basic compared to Claude or Codex.
In the Snake Game task, Gemini produced a playable result but lacked visual polish and consistent structure.
Documentation and comments were also limited.
In short, Gemini is great for rapid prototyping or testing ideas quickly, but not for projects where you need beautiful UI, advanced logic, or long-term maintainability.


Codex CLI: Flexible but Slower

Codex CLI offered good flexibility and handled diverse prompts reasonably well.
It could generate functional UIs with decent styling, somewhere between Gemini’s simplicity and Claude’s refinement.
However, its main drawback was speed — responses were slower, and sometimes additional manual intervention was needed to correct or complete the code.
Codex is still a solid option when you need to tweak results manually or explore multiple implementation approaches, but it doesn’t match Claude’s polish or Gemini’s speed.


Overall Impression

After testing multiple projects, the overall ranking became clear:

  • Gemini CLI is the fastest but produces simple and unpolished code.

  • Claude Code delivers the most reliable, structured, and visually refined results.

  • Codex CLI sits in between — flexible but slower and less cohesive.

Each tool has its strengths. Gemini is ideal for quick builds, Codex for experimentation, and Claude Code for professional, trust-ready outputs.

In short:

Gemini wins on speed. Claude wins on quality. Codex stands in between — flexible but slower.

OpenAI AgentKit vs Dify

🤖 OpenAI AgentKit vs Dify

A Comprehensive Technical Comparison of Two Leading AI Agent Development Platforms

Last Updated: October 2025 | DevDay 2025 Analysis

Executive Summary: OpenAI AgentKit and Dify represent two distinct approaches to AI agent development. AgentKit, announced at OpenAI’s DevDay 2025, offers a comprehensive, proprietary toolkit designed to streamline agent creation within the OpenAI ecosystem. Dify, an open-source platform, provides extensive flexibility with multi-provider LLM support and full infrastructure control. This guide examines both platforms in depth to help you make an informed decision.

🚀 Platform Overview

OpenAI AgentKit

Launched October 2025 at DevDay, AgentKit is OpenAI’s complete toolkit for building production-ready AI agents with minimal friction.

  • Proprietary platform by OpenAI
  • Cloud-based deployment
  • Deep OpenAI ecosystem integration
  • Enterprise-grade security built-in
  • Visual drag-and-drop builder
  • Rapid prototyping (agents in hours, not months)

Dify

Open-source LLMOps platform with 180,000+ developers, supporting comprehensive AI application development with full control.

  • 100% open-source platform
  • Self-hosted or cloud deployment
  • Multi-provider LLM support (GPT, Claude, Llama, etc.)
  • Complete data sovereignty
  • Extensive RAG capabilities
  • Active community of 180,000+ developers

🎯 OpenAI AgentKit – Core Features

🎨 Agent Builder

A visual canvas for creating and versioning multi-agent workflows using drag-and-drop functionality. Developers can design complex agent interactions without extensive coding.

  • Visual workflow designer
  • Version control for agent workflows
  • Multi-agent orchestration
  • Real-time collaboration
  • 70% faster iteration cycles reported

💬 ChatKit

Embeddable, customizable chat interfaces that can be integrated directly into your applications with your own branding and workflows.

  • White-label chat interfaces
  • Custom branding options
  • Pre-built UI components
  • Seamless product integration
  • Mobile-responsive design

🔌 Connector Registry

Centralized admin dashboard for managing secure connections between agents and both internal tools and third-party systems.

  • Pre-built connectors: Dropbox, Google Drive, SharePoint, Teams
  • Secure data access management
  • Admin control panel
  • Third-party MCP server support
  • Enterprise-grade security controls

📊 Evaluation & Optimization

Comprehensive tools for measuring and improving agent performance with automated testing and optimization.

  • Datasets for component testing
  • End-to-end trace grading
  • Automated prompt optimization
  • Third-party model evaluation support
  • Custom grading criteria

🔒 Security & Guardrails

Built-in security layers protecting against data leakage, jailbreaks, and unintended behaviors.

  • PII leak detection and prevention
  • Jailbreak protection
  • Content filtering
  • OpenAI’s standard security measures
  • Compliance-ready infrastructure

⚡ Performance

Optimized for rapid development and deployment with impressive benchmarks demonstrated at DevDay 2025.

  • Live demo: 2 agents built in <8 minutes
  • Hours to deploy vs months traditionally
  • Built on Responses API
  • Integration with GPT-5 Codex
  • Dynamic thinking time adjustment

🎯 Real-World Success Story

Ramp (Fintech): Built a complete procurement agent in just a few hours instead of months using AgentKit. Their teams reported a 70% reduction in iteration cycles, launching agents in two sprints rather than two quarters. Agent Builder enabled seamless collaboration between product, legal, and engineering teams on the same visual canvas.

🛠️ Dify – Core Features

🎯 Visual Workflow Builder

Intuitive canvas for building and testing AI workflows with comprehensive model support and visual orchestration.

  • Drag-and-drop workflow design
  • Support for 100+ LLM models
  • Real-time debugging with node inspection
  • Variable tracking during execution
  • Instant step-by-step testing

🧠 Comprehensive Model Support

Seamless integration with hundreds of proprietary and open-source LLMs from multiple providers.

  • OpenAI: GPT-3.5, GPT-4, GPT-5
  • Anthropic: Claude models
  • Open-source: Llama3, Mistral, Qwen
  • Self-hosted model support
  • Any OpenAI API-compatible model

📚 RAG Pipeline

Extensive Retrieval-Augmented Generation capabilities covering the entire document lifecycle.

  • Document ingestion from multiple formats
  • PDF, PPT, Word extraction
  • Vector database integration
  • Advanced retrieval strategies
  • Metadata-based filtering for security
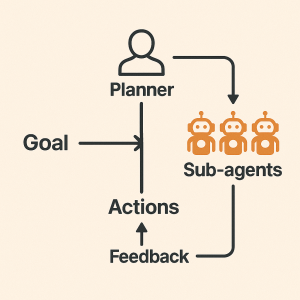
🤖 Agent Node System

Flexible agent architecture with customizable strategies for autonomous decision-making within workflows.

  • Plug-in “Agent Strategies”
  • Autonomous task handling
  • Custom tool integration
  • Multi-agent collaboration
  • Dynamic workflow adaptation

🎛️ Prompt Engineering IDE

Intuitive interface for crafting, testing, and comparing prompts across different models.

  • Visual prompt editor
  • Model performance comparison
  • A/B testing capabilities
  • Text-to-speech integration
  • Template management

📊 Observability & Operations

Full visibility into AI application performance with comprehensive logging and monitoring.

  • Complete execution logs
  • Cost tracking per execution
  • Conversation auditing
  • Performance metrics dashboard
  • Version control for workflows

🏢 Enterprise Features

Production-ready infrastructure with enterprise-grade security and scalability.

  • Self-hosted deployment options
  • AWS Marketplace integration
  • Custom branding and white-labeling
  • SSO and access control
  • Multi-tenant architecture

🌐 Open Source Advantage

Community-driven development with transparent roadmap and extensive customization options.

  • 180,000+ developer community
  • 34,800+ GitHub stars
  • Regular feature updates
  • Community plugins and extensions
  • Full code access and customization

🎯 Real-World Success Story

Volvo Cars: Uses Dify for rapid AI validation and deployment, enabling teams to quickly design and deploy complex NLP pipelines. This approach significantly improved assessment product quality while reducing both cost and time to market. Dify’s democratized AI development allows even non-technical team members to contribute to AI initiatives.

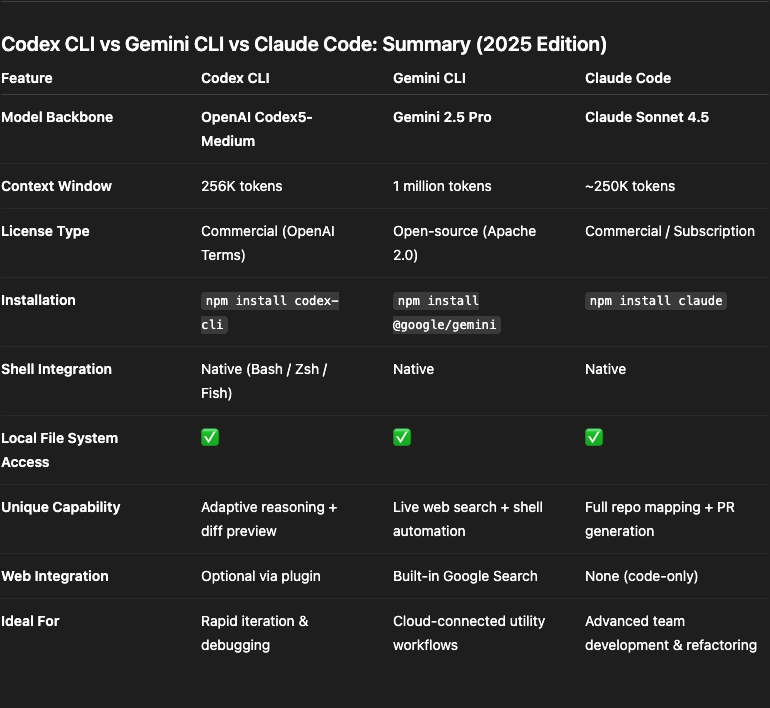
⚖️ Detailed Comparison

Feature / Aspect OpenAI AgentKit Dify
Launch Date October 2025 (DevDay 2025) May 2023 (Established platform)
Source Model Proprietary, closed-source 100% open-source (GitHub)
Ecosystem OpenAI-exclusive (GPT models) Multi-provider (100+ LLMs from dozens of providers)
Deployment Options Cloud-based on OpenAI platform only Self-hosted, cloud, or hybrid deployment
Data Sovereignty Managed by OpenAI infrastructure Full control – host anywhere, complete data ownership
Model Support OpenAI models (GPT-3.5, GPT-4, GPT-5, Codex) GPT, Claude, Llama3, Mistral, Qwen, self-hosted models, any OpenAI-compatible API
Visual Builder ✓ Agent Builder (drag-and-drop, currently in beta) ✓ Visual workflow canvas (production-ready)
RAG Capabilities Limited documentation available Extensive: document ingestion, retrieval, PDF/PPT/Word extraction, vector databases, metadata filtering
Chat Interface ChatKit (embeddable, customizable) Built-in chat UI with full customization
Connectors Connector Registry (Dropbox, Drive, SharePoint, Teams, MCP servers) – Limited beta Extensive integration options, custom API connections, community plugins
Evaluation Tools Datasets, trace grading, automated prompt optimization, custom graders Full observability, debugging tools, version control, execution logs
Security Features PII detection, jailbreak protection, OpenAI security standards, guardrails Self-managed security, SSO, access control, custom security policies
Community Size New (launched Oct 2025), growing adoption 180,000+ developers, 59,000+ end users, 34,800+ GitHub stars
Pricing Model Included with standard API pricing, enterprise features for some components Free tier, Professional ($59/month), Team ($159/month), Enterprise (custom)
Development Speed Hours to build agents (demo showed <8 minutes for 2 agents) Rapid prototyping, established workflow templates
Customization Within OpenAI ecosystem constraints Unlimited – full code access, custom modifications possible
Learning Curve Low – designed for ease of use Low to medium – extensive documentation and community support
Best For OpenAI-committed teams, rapid prototyping, enterprise users wanting managed solution Multi-provider needs, data sovereignty requirements, open-source advocates, full customization
Production Readiness ChatKit & Evals: Generally available
Agent Builder: Beta
Connector Registry: Limited beta
Fully production-ready, battle-tested by 180,000+ developers
API Integration Built on OpenAI Responses API RESTful API, webhook support, extensive integration options

✅ Pros & Cons Analysis

OpenAI AgentKit

Advantages

  • Rapid Development: Build functional agents in hours rather than months with visual tools
  • Seamless Integration: Deep integration with OpenAI ecosystem and GPT models
  • Enterprise Security: Built-in guardrails, PII protection, and OpenAI security standards
  • Managed Infrastructure: No DevOps burden, fully managed by OpenAI
  • Cutting-Edge Models: Immediate access to latest GPT models and features
  • Live Demo Success: Proven capability (2 agents in <8 minutes)
  • Unified Toolkit: All necessary tools in one platform
  • Evaluation Tools: Comprehensive testing and optimization features

Limitations

  • Vendor Lock-in: Exclusively tied to OpenAI ecosystem
  • Limited Model Choice: Cannot use Claude, Llama, or other non-OpenAI models
  • New Platform: Just launched (Oct 2025), limited production track record
  • Beta Features: Key components still in beta (Agent Builder, Connector Registry)
  • No Data Sovereignty: Data managed by OpenAI, not self-hostable
  • Closed Source: Cannot inspect or modify underlying code
  • Pricing Uncertainty: Costs tied to OpenAI API pricing model
  • Limited Customization: Constrained by platform design decisions

Dify

Advantages

  • Open Source Freedom: Full code access, unlimited customization, no vendor lock-in
  • Multi-Provider Support: Use any LLM – GPT, Claude, Llama, Mistral, or self-hosted models
  • Data Sovereignty: Complete control over data, self-hosting options
  • Extensive RAG: Comprehensive document processing and retrieval capabilities
  • Large Community: 180,000+ developers, active development, extensive resources
  • Production Proven: Battle-tested since 2023, used by major companies like Volvo
  • Flexible Deployment: Cloud, self-hosted, or hybrid options
  • Cost Control: Use cheaper models or self-hosted options, transparent pricing
  • No Vendor Dependencies: Switch providers or models without platform changes

Limitations

  • DevOps Responsibility: Self-hosting requires infrastructure management
  • Learning Curve: More complex than managed solutions for beginners
  • No Native OpenAI Features: Latest OpenAI-specific features may lag
  • Security Setup: Must configure own security measures for self-hosted
  • Community Support: Relies on community vs dedicated support team
  • Integration Effort: May require more work to integrate custom tools
  • Scalability Management: Need to handle scaling for high-traffic scenarios

💡 Use Cases & Applications

OpenAI AgentKit – Ideal Use Cases

🏢 Enterprise Rapid Prototyping

Large organizations already invested in OpenAI wanting to quickly deploy AI agents across multiple departments without heavy technical overhead.

🚀 Startup MVPs

Startups needing to build and iterate on AI-powered products rapidly with minimal infrastructure investment and maximum speed to market.

💼 Business Process Automation

Companies automating internal workflows like procurement, customer support, or data analysis using OpenAI’s latest models.

🔬 Research & Development

Teams exploring cutting-edge AI capabilities with OpenAI’s latest models and wanting managed infrastructure for experiments.

Dify – Ideal Use Cases

🏦 Regulated Industries

Banking, healthcare, or government organizations requiring full data sovereignty, self-hosting, and complete audit trails.

🌐 Multi-Model Applications

Projects needing to leverage multiple LLM providers for cost optimization, feature diversity, or redundancy.

🛠️ Custom AI Solutions

Development teams building highly customized AI applications requiring deep integration with existing systems and workflows.

📚 Knowledge Management

Organizations building comprehensive RAG systems with complex document processing, vector search, and metadata filtering needs.

🎓 Educational & Research

Academic institutions and researchers needing transparent, customizable AI systems with full control over model selection and data.

🌍 Global Operations

International companies needing to deploy AI across multiple regions with varying data residency requirements.

💰 Pricing Comparison

OpenAI AgentKit Pricing

Model: Included with standard OpenAI API pricing. You pay for:

  • API calls to GPT models (token-based pricing)
  • Standard OpenAI usage fees apply
  • Enterprise features may have additional costs
  • Connector Registry requires Global Admin Console (available for Enterprise/Edu)

Advantage: No separate platform fee, but tied to OpenAI’s pricing

Consideration: Costs can scale significantly with high usage; no control over rate changes

Dify Pricing

Sandbox (Free):

  • 200 OpenAI calls included
  • Core features access
  • Ideal for testing and small projects

Professional ($59/month):

  • For independent developers & small teams
  • Production AI applications
  • Increased resources and team collaboration

Team ($159/month):

  • Medium-sized teams
  • Higher throughput requirements
  • Advanced collaboration features

Enterprise (Custom):

  • Custom deployment options
  • Dedicated support
  • SLA guarantees
  • On-premise or private cloud hosting

Self-Hosted (Free):

  • Deploy on your own infrastructure at no platform cost
  • Only pay for your chosen LLM provider (can use cheaper options)
  • Complete cost control

🎯 Decision Framework: Which Platform Should You Choose?

Choose OpenAI AgentKit If:

  • You’re already heavily invested in the OpenAI ecosystem
  • You want the fastest possible time-to-market with minimal setup
  • Your use case doesn’t require data to stay on-premise
  • You prefer managed infrastructure over self-hosting
  • You need the latest GPT models immediately upon release
  • Your team lacks DevOps resources for infrastructure management
  • Budget allows for OpenAI’s premium pricing model
  • You value tight integration over flexibility
  • Compliance allows cloud-based AI processing
  • You’re comfortable with platform limitations for ease of use

Choose Dify If:

  • You need to use multiple LLM providers or specific models
  • Data sovereignty and privacy are critical requirements
  • You want complete control over your AI infrastructure
  • Your organization requires self-hosted solutions
  • Cost optimization through model flexibility is important
  • You have DevOps capability for self-hosting
  • You need extensive RAG and document processing capabilities
  • Open-source transparency is a requirement
  • You want to avoid vendor lock-in
  • Your use case requires deep customization
  • You’re in a regulated industry (banking, healthcare, government)
  • You prefer community-driven development

🔮 Future Outlook & Roadmap

OpenAI AgentKit Roadmap

OpenAI plans to add standalone Workflows API and agent deployment options to ChatGPT. Expect rapid iteration and new features as the platform matures beyond beta stage.

Dify Development

Active open-source development with regular releases. Community-driven feature requests and transparent roadmap on GitHub. Continuous improvements to RAG, workflows, and integrations.

Market Competition

Both platforms face competition from LangChain, n8n, Zapier Central, and others. The AI agent space is rapidly evolving with new players entering regularly.

Convergence Trends

Expect features to converge over time as both platforms mature. Visual builders, multi-agent orchestration, and evaluation tools are becoming industry standards.

🎓 Final Recommendation

For most organizations: The choice depends on your priorities. If you value speed, simplicity, and are committed to OpenAI, AgentKit offers the fastest path to production agents. If you need flexibility, data control, and multi-provider support, Dify provides superior long-term value despite requiring more initial setup.

Hybrid Approach: Some organizations use AgentKit for rapid prototyping and Dify for production deployments where data sovereignty and model flexibility matter. This combines the speed of AgentKit with the control of Dify.

Last Updated: October 2025 | Based on OpenAI DevDay 2025 announcements

Sources: Official OpenAI documentation, Dify GitHub repository, TechCrunch, VentureBeat, Medium technical analyses

This comparison is for informational purposes. Features and pricing subject to change. Always consult official documentation for the most current information.


Building Intelligent AI Agents with OpenAI: From Raw API to Official Agents SDK

Introduction

Artificial Intelligence agents are revolutionizing how we interact with technology. Unlike traditional chatbots that simply respond to queries, AI agents can understand context, make decisions, and use tools to accomplish complex tasks autonomously. This project demonstrates how to build progressively sophisticated AI agents using both the OpenAI API and the official OpenAI Agents SDK.

Whether you’re a beginner exploring AI development or an experienced developer looking to integrate intelligent agents into your applications, this sample project provides practical, hands-on examples comparing two approaches: custom implementation using raw OpenAI API and using the official Agents SDK.

What is an AI Agent?

An AI agent is an autonomous system powered by a language model that can:

  • Understand natural language instructions
  • Make intelligent decisions about which tools to use
  • Execute functions to interact with external systems
  • Reason about results and provide meaningful responses
  • Collaborate with other agents to solve complex problems

Think of it as giving your AI assistant a toolbox. Instead of just talking, it can now check the weather, perform calculations, search databases, and much more.

Project Overview

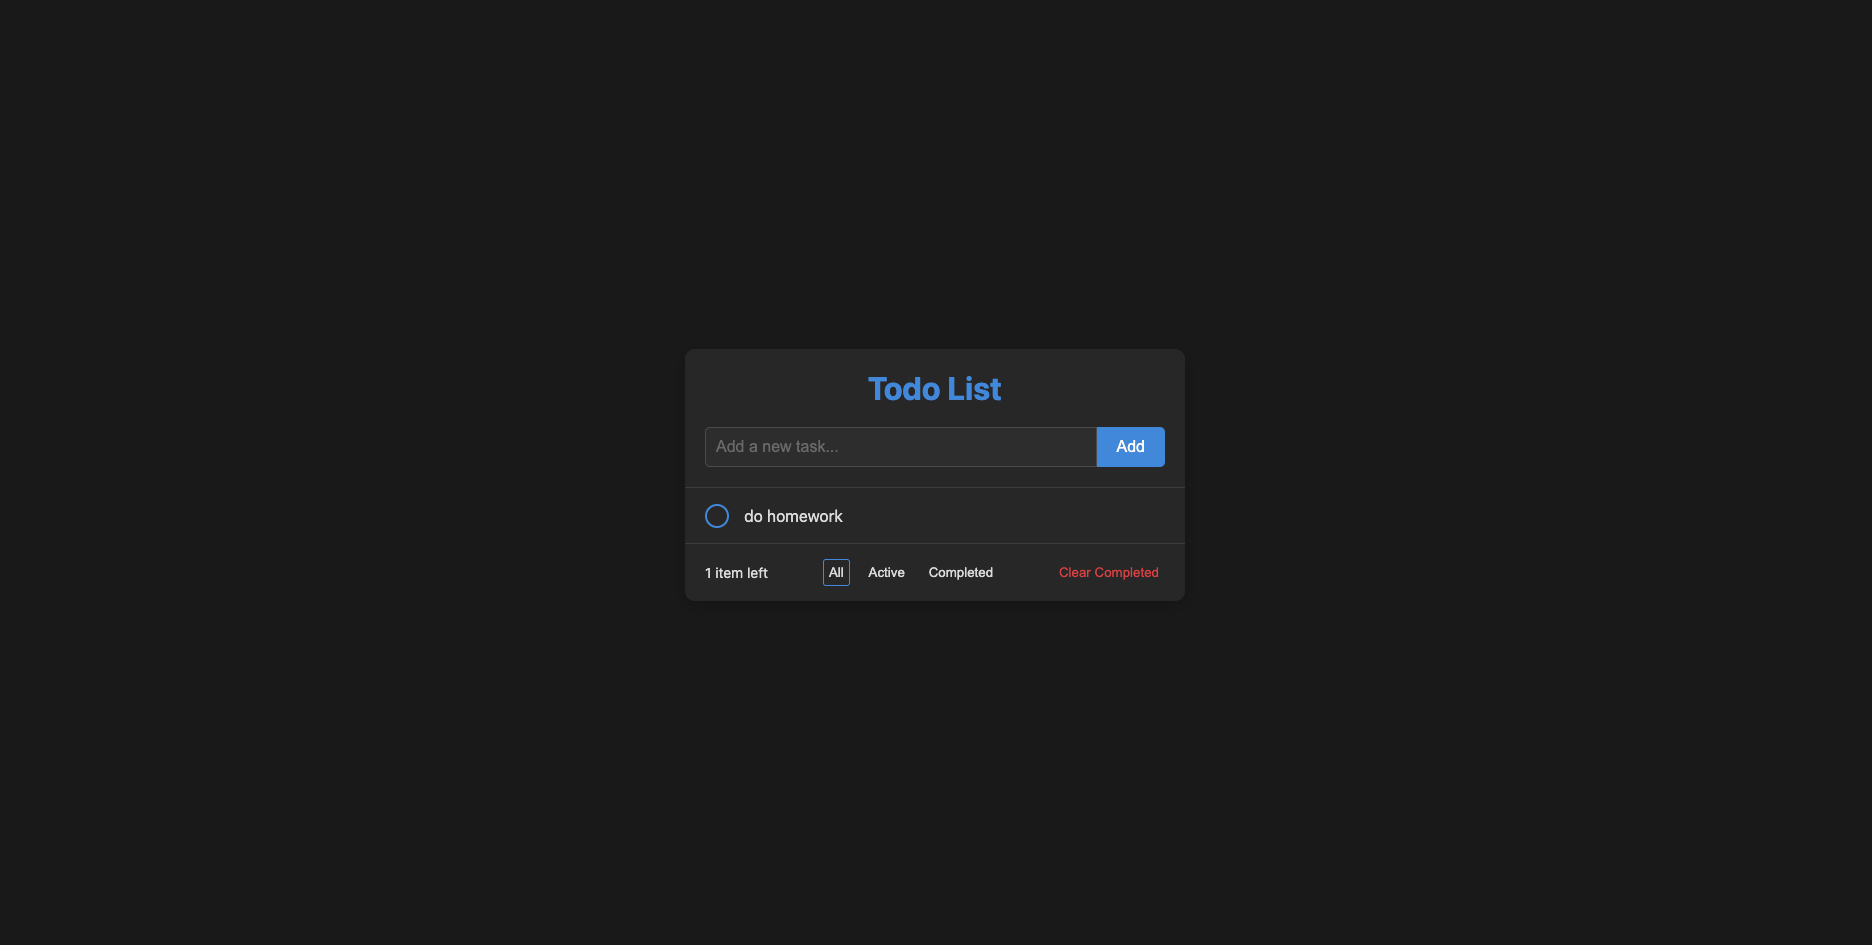
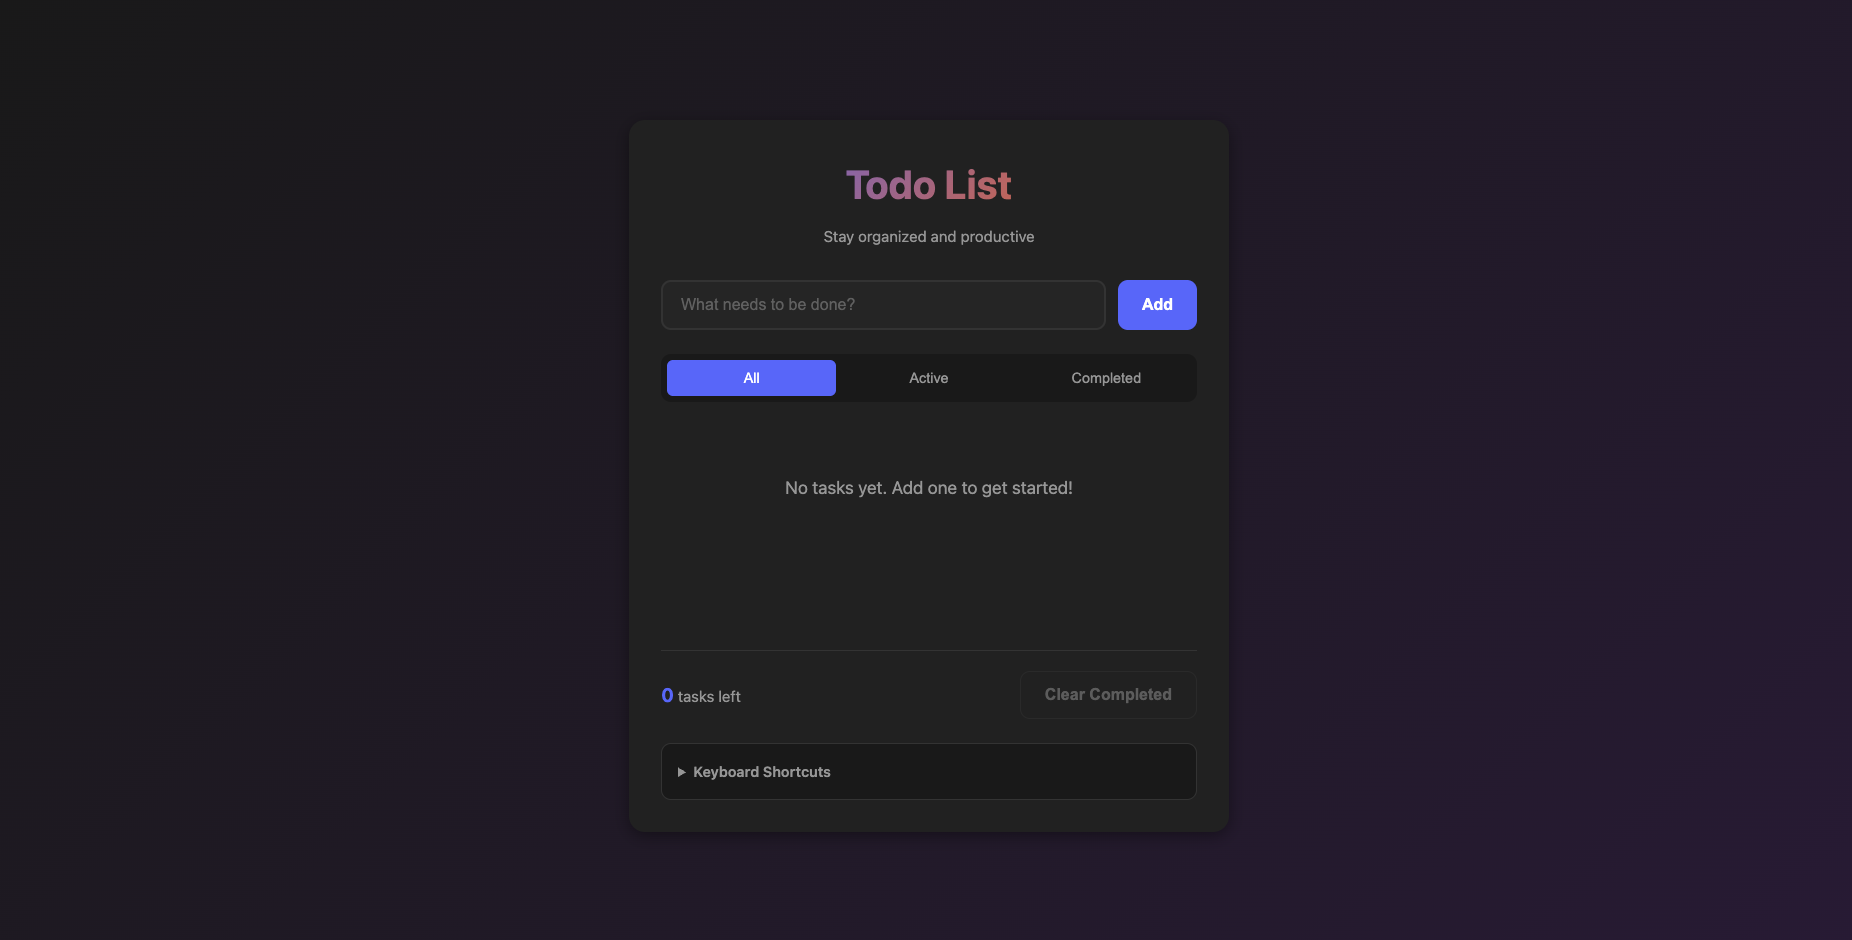
The OpenAI AgentKit Sample Project demonstrates six levels of AI agent sophistication across two implementation approaches:

OpenAI API Approach (Custom Implementation)

1. Basic Agent

A foundational implementation showing how to set up OpenAI’s Chat Completions API.

What you’ll learn:

  • Setting up the OpenAI client
  • Configuring system and user messages
  • Managing model parameters (temperature, tokens)
  • Handling API responses

2. Agent with Tools

Introduces function calling where the agent decides when and how to use specific tools.

Available Tools:

  • Weather Tool: Retrieves current weather information
  • Calculator Tool: Performs mathematical operations
  • Time Tool: Gets current date and time across timezones

3. Advanced Agent

Production-ready example with sophisticated features including detailed logging, error handling, and multiple complex tools.

Enhanced Capabilities:

  • Wikipedia search integration
  • Sentiment analysis
  • Timezone-aware time retrieval
  • Comprehensive error handling
  • Performance statistics and logging

OpenAI Agents SDK Approach (Official Framework)

4. SDK Basic Agent

Simple agent using the official OpenAI Agents SDK with automatic agent loop and simplified API.

Key Features:

  • Uses Agent and run from @openai/agents
  • Automatic conversation management
  • Clean, minimal code

5. SDK Agent with Tools

Agent with tools using proper SDK conventions and automatic schema generation.

Tools:

  • Weather lookup with Zod validation
  • Mathematical calculations
  • Time zone support

Key Features:

  • Tools defined with tool() helper
  • Zod-powered parameter validation
  • Automatic schema generation from TypeScript types

6. SDK Multi-Agent System

Sophisticated multi-agent system with specialized agents and handoffs.

Agents:

  • WeatherExpert: Handles weather queries
  • MathExpert: Performs calculations
  • KnowledgeExpert: Searches knowledge base
  • Coordinator: Routes requests to specialists

Technology Stack

OpenAI API
GPT-4o-mini model for intelligent responses
@openai/agents
Official OpenAI Agents SDK
Zod
Runtime type validation and schema generation
Node.js
Runtime environment (22+ required for SDK)
Express.js
Web server framework
dotenv
Environment variable management

Getting Started

Prerequisites

Installation

1. Clone or download the project

cd openai-agentkit-sample

2. Install dependencies

npm install

This will install:

  • openai – Raw OpenAI API client
  • @openai/agents – Official Agents SDK
  • zod – Schema validation
  • Other dependencies

3. Configure environment variables

cp .env.example .env

Edit .env and add your OpenAI API key:

OPENAI_API_KEY=sk-your-actual-api-key-here

Running the Examples

Start the web server:

npm start

Open http://localhost:3000 in your browser

Run OpenAI API examples:

npm run example:basic      # Basic agent
npm run example:tools      # Agent with tools
npm run example:advanced   # Advanced agent

Run OpenAI Agents SDK examples:

npm run example:sdk-basic  # SDK basic agent
npm run example:sdk-tools  # SDK with tools
npm run example:sdk-multi  # Multi-agent system

Comparing the Two Approaches

OpenAI API (Custom Implementation)

Pros:

  • Full control over every aspect
  • Deep understanding of agent mechanics
  • Maximum flexibility
  • No framework constraints

Cons:

  • More code to write and maintain
  • Manual agent loop implementation
  • Manual tool schema definition
  • More error-prone

Example – Tool Definition (Raw API):

const weatherTool = {
  type: 'function',
  function: {
    name: 'get_weather',
    description: 'Get the current weather in a given location',
    parameters: {
      type: 'object',
      properties: {
        location: {
          type: 'string',
          description: 'The city and country',
        },
        unit: {
          type: 'string',
          enum: ['celsius', 'fahrenheit'],
        },
      },
      required: ['location'],
    },
  },
};
// Manual tool execution
function executeFunction(functionName, args) {
  switch (functionName) {
    case 'get_weather':
      return getWeather(args.location, args.unit);
    // ... more cases
  }
}

OpenAI Agents SDK (Official Framework)

Pros:

  • Less code, faster development
  • Automatic agent loop
  • Automatic schema generation from Zod
  • Built-in handoffs for multi-agent systems
  • Production-ready patterns
  • Type-safe with TypeScript

Cons:

  • Less control over internals
  • Framework learning curve
  • Tied to SDK conventions
  • Node.js 22+ requirement

Example – Tool Definition (Agents SDK):

import { tool } from '@openai/agents';
import { z } from 'zod';
const getWeatherTool = tool({
  name: 'get_weather',
  description: 'Get the current weather for a given location',
  parameters: z.object({
    location: z.string().describe('The city and country'),
    unit: z.enum(['celsius', 'fahrenheit']).optional().default('celsius'),
  }),
  async execute({ location, unit }) {
    // Tool implementation
    return JSON.stringify({ temperature: 22, condition: 'Sunny' });
  },
});
// Automatic execution - no switch statement needed!
const agent = new Agent({
  tools: [getWeatherTool],
});

Key Concepts

Function Calling / Tool Usage

Both approaches support function calling, where the AI model can “call” functions you define:

  1. Define tool: Describe function, parameters, and purpose
  2. Model decides: Model automatically decides when to use tools
  3. Execute tool: Your code executes the function
  4. Return result: Send result back to model
  5. Final response: Model uses result to create answer

OpenAI Agents SDK Advantages

The Agents SDK provides several powerful features:

Automatic Schema Generation:

// SDK automatically generates JSON schema from Zod!
z.object({
  city: z.string(),
  unit: z.enum(['celsius', 'fahrenheit']).optional(),
})

Agent Handoffs:

const coordinator = new Agent({
  handoffs: [weatherAgent, mathAgent, knowledgeAgent],
});
// Coordinator can automatically route to specialists

Built-in Agent Loop:

// SDK handles the entire conversation loop
const result = await run(agent, "What's the weather in Hanoi?");
console.log(result.finalOutput);

Practical Use Cases

Customer Service Automation

  • Answer questions using knowledge bases
  • Check order status
  • Process refunds
  • Escalate to human agents
  • Route to specialized agents

Personal Assistant Applications

  • Schedule management
  • Email drafting
  • Research and information gathering
  • Task automation
  • Multi-task coordination

Data Analysis Tools

  • Query databases
  • Generate reports
  • Perform calculations
  • Visualize insights
  • Collaborate across data sources

Best Practices

1. Clear Tool Descriptions

Make function descriptions detailed and specific:

Good:
description: 'Get the current weather including temperature, conditions, and humidity for a specific city and country'
Bad:
description: 'Get weather'

2. Use Zod for Validation (SDK)

parameters: z.object({
  email: z.string().email(),
  age: z.number().min(0).max(120),
  role: z.enum(['admin', 'user', 'guest']),
})

3. Error Handling

Always implement comprehensive error handling:

async execute({ city }) {
  try {
    const result = await weatherAPI.get(city);
    return JSON.stringify(result);
  } catch (error) {
    return JSON.stringify({ error: error.message });
  }
}

4. Tool Modularity

Create small, focused tools rather than monolithic ones:

// Good - specific tools
const getWeatherTool = tool({...});
const getForecastTool = tool({...});
// Bad - one giant tool
const weatherAndForecastAndHistoryTool = tool({...});

Multi-Agent Patterns

The Agents SDK excels at multi-agent workflows:

Specialist Pattern

const weatherExpert = new Agent({
  name: 'WeatherExpert',
  tools: [getWeatherTool],
});
const mathExpert = new Agent({
  name: 'MathExpert',
  tools: [calculateTool],
});
const coordinator = new Agent({
  handoffs: [weatherExpert, mathExpert],
});

Hierarchical Delegation

  • Coordinator receives user request
  • Analyzes which specialist is needed
  • Hands off to appropriate agent
  • Aggregates results
  • Returns unified response

API Endpoints

The project includes a web server with both approaches:

Raw API:

  • POST /api/chat/basic – Basic chat completion
  • POST /api/chat/with-tools – Manual tool handling

Agents SDK:

  • POST /api/chat/agents-sdk – SDK-powered agent with tools

When to Use Which Approach?

Use OpenAI API (Custom Implementation) When:

  • You need full control and customization
  • Learning how agents work at a low level
  • Implementing highly custom logic
  • Working with existing codebases
  • Framework constraints are a concern

Use OpenAI Agents SDK When:

  • Building production applications quickly
  • Need multi-agent workflows
  • Want type-safe tool definitions
  • Prefer less boilerplate code
  • Following best practices matters
  • Team collaboration is important

Performance Considerations

  • Model Selection: GPT-4o-mini offers great balance of capability and cost
  • Caching: Consider caching frequent queries
  • Async Operations: Use Promise.all() for parallel tool execution
  • Response Streaming: Implement for better UX
  • Rate Limiting: Monitor and manage API rate limits

Troubleshooting

Issue: “Invalid API Key”

  • Verify .env file contains correct API key
  • Check key is active in OpenAI dashboard

Issue: Tools Not Being Called

  • Ensure tool descriptions are clear and specific
  • Try more explicit user prompts
  • Check parameter schemas are correctly formatted

Issue: “Unsupported tool type”

  • Use tool() helper with Agents SDK
  • Ensure Zod schemas are properly defined
  • Check you’re importing from @openai/agents

Resources

Comparison Table

Feature Raw OpenAI API Agents SDK
Code Lines ~200 for basic agent with tools ~50 for same functionality
Schema Definition Manual JSON Automatic from Zod
Agent Loop Manual implementation Built-in
Type Safety Limited Full TypeScript support
Multi-Agent Manual implementation Built-in handoffs
Learning Curve Steep Moderate
Flexibility Maximum High
Production Ready Requires work Out-of-the-box
Node.js Requirement 18+ 22+

Conclusion

This project demonstrates two powerful approaches to building AI agents:

  1. Raw OpenAI API: Provides deep understanding and maximum control. Perfect for learning and custom implementations.
  2. OpenAI Agents SDK: Offers productivity, type safety, and production-ready patterns. Ideal for building real applications quickly.

Both approaches have their place. Start with the SDK for production work, but understanding the raw API approach gives you insights into how agents actually work.

Next Steps

  1. Experiment: Run all six examples
  2. Compare: Notice the differences in code complexity
  3. Customize: Create your own tools
  4. Integrate: Connect real APIs
  5. Deploy: Move to production with proper error handling
  6. Scale: Implement multi-agent systems for complex tasks

Contributing

Contributions, suggestions, and improvements are welcome! Feel free to:

  • Report issues
  • Submit pull requests
  • Share your custom tools
  • Suggest new examples

Demo

Github : https://github.com/cuongdvscuti/openai-agentkit-scuti

License

MIT License – Feel free to use this project for learning, development, or commercial purposes.


Ready to build your own AI agents?
Clone the repository, follow the setup instructions, and start with whichever approach fits your needs. The future of intelligent automation is in your hands!

KHI NGÔN NGỮ TRỞ THÀNH TRÍ TUỆ

🧠 TƯƠNG LAI CỦA LLM (Large Language Model)

“Tương lai của LLM không nằm ở việc làm mô hình to hơn, mà là khiến nó thông minh hơn, linh hoạt hơn, và thực sự biết hành động.”

Vài năm qua, thế giới chứng kiến sự bùng nổ của các mô hình ngôn ngữ lớn (Large Language Models – LLM) như GPT, Claude, Gemini, Llama hay Mistral.
Chúng giúp ta viết văn bản, lập trình, soạn hợp đồng, thậm chí lập kế hoạch marketing.

Nếu năm 2020, AI chỉ là “trợ lý gõ chữ nhanh hơn”, thì đến 2025, nó đã trở thành một cộng sự thực thụ.
Nhưng tương lai sẽ ra sao? Liệu LLM có thể “hiểu”, “suy nghĩ” và “hành động” như con người?


🧩 1. Từ ngôn ngữ đến trí tuệ đa giác quan

Trước đây, LLM chỉ hiểu văn bản.
Giờ đây, các thế hệ mới như GPT-4o hay Gemini 1.5 đã có thể nhìn hình, nghe âm thanh, đọc video và cảm nhận ngữ cảnh.

Ví dụ, bạn có thể gửi ảnh hoá đơn, video cuộc họp hay bản ghi âm — và AI hiểu được cả nội dung lẫn ý nghĩa.
Đó là bước tiến từ language model thành multimodal intelligencetrí tuệ đa phương thức.


🧮 2. Khi AI bắt đầu suy nghĩ thật sự

Các mô hình tương lai sẽ không chỉ “đoán chữ tiếp theo” như cũ, mà có thể tư duy theo chuỗi, kiểm tra kết quả, và tự sửa sai.

Ví dụ, thay vì chỉ trả lời “Kết quả là 42”, AI sẽ nói:

“Để tính vậy, tôi nhân A với B, sau đó trừ đi C. Tuy nhiên, nếu giả định khác, kết quả có thể thay đổi.”

Đây chính là bước tiến gọi là reasoning (suy luận) — nền tảng để AI hiểu bản chất thay vì chỉ sao chép dữ liệu.

Cùng lúc, LLM còn biết sử dụng công cụ:

  • Tự mở trình duyệt tìm thông tin mới.

  • Gọi API để lấy dữ liệu thời gian thực.

  • Chạy code hoặc tính toán trong Python.


🤖 3. Thế hệ kế tiếp: AI Agents – trợ lý tự hành

Một xu hướng mạnh mẽ khác là Agentic AI – AI biết hành động chứ không chỉ nói chuyện.

Hãy tưởng tượng bạn nói:

“Hãy chuẩn bị hội nghị khách hàng vào tháng tới.”

AI sẽ:

  1. Tự lên kế hoạch chi tiết.

  2. Tạo danh sách việc cần làm.

  3. Gửi email mời khách.

  4. Đặt phòng họp.

  5. Chuẩn bị slide thuyết trình.

Tất cả được điều phối bởi nhiều “AI con” – giống như bạn có một đội ngũ ảo làm việc 24/7.


💡 4. LLM cá nhân hóa – Trí tuệ cho riêng bạn

Tương lai, mỗi người sẽ có một AI riêng – hiểu cách bạn nói, cách bạn viết, thậm chí biết cả thói quen và phong cách của bạn.

AI của bạn có thể:

  • Gợi ý cách viết email theo giọng của bạn.

  • Nhớ rằng bạn không họp vào thứ Sáu.

  • Tự động tóm tắt tin tức bạn quan tâm.

Đây là Personal AI – mô hình nhỏ, riêng tư, chạy trên thiết bị hoặc máy chủ nội bộ.
Không còn là “trợ lý của công ty”, mà là “trợ lý của chính bạn”.


⚙️ 5. Hạ tầng tương lai: Cloud + On-Prem + Edge

Không chỉ phần mềm, mà cả hạ tầng AI cũng đang thay đổi.

  • Cloud (đám mây): dành cho mô hình cực lớn, dùng nhiều GPU.

  • On-Prem (nội bộ): dùng cho dữ liệu nhạy cảm, như tài chính, y tế.

  • Edge (thiết bị cá nhân): mô hình mini chạy trực tiếp trên laptop hoặc điện thoại.

Điều đó có nghĩa:
Bạn có thể vừa dùng AI mạnh trên cloud, vừa giữ dữ liệu riêng tư hoàn toàn trong hệ thống của mình.


📈 6. Ứng dụng thực tế trong 5 năm tới

Lĩnh vực Ứng dụng LLM tương lai
💼 Văn phòng Trợ lý soạn thảo, lập kế hoạch, tóm tắt cuộc họp
🧾 Doanh nghiệp Tự đọc hóa đơn, hợp đồng, báo cáo tài chính
💻 Lập trình AI đồng lập trình, kiểm thử, và triển khai code
🏥 Y tế Hỗ trợ chẩn đoán, ghi chú bệnh án, tư vấn sức khỏe
🎓 Giáo dục Gia sư cá nhân hóa, theo dõi tiến trình học tập
🤖 Robot Kết hợp LLM để ra lệnh và hướng dẫn hành động thực tế


🔒 7. Thách thức phía trước

LLM dù mạnh mẽ vẫn phải đối mặt với nhiều câu hỏi lớn:

  • Làm sao kiểm soát thông tin sai lệch (hallucination)?

  • Làm sao bảo vệ dữ liệu cá nhân khi AI “nhớ quá nhiều”?

  • Ai chịu trách nhiệm pháp lý khi AI đưa ra quyết định sai?

  • Và quan trọng nhất: con người sẽ đóng vai trò gì trong kỷ nguyên AI?

Chính vì thế, các nước đang xây dựng luật AI và hệ thống AI Governance để đảm bảo an toàn, minh bạch và trách nhiệm.


🕰 8. Hành trình 10 năm của LLM

Giai đoạn Đặc trưng
2020–2023 Chatbot, text-only LLM (GPT-3, GPT-4)
2024–2026 Multimodal + Reasoning + Agentic AI
2026–2030 Personal AI + On-device LLM + Robotics

🌟 Kết luận

Từ một chatbot biết nói, LLM đang trở thành nền tảng trí tuệ toàn diện – có thể hiểu, học hỏi, và hành động.

Trong vài năm tới, AI không còn là công cụ, mà là đồng nghiệp, cộng sự, thậm chí là người bạn học suốt đời.

Chúng ta không chỉ “sử dụng AI”, mà sẽ cùng sống và làm việc với AI mỗi ngày.

Automatically Generate Google Slides with an AI Prompt

I came across a very interesting idea from the author まじん (Majin) on note.com:

Majin used Gemini to turn a single prompt into a complete Google Slides presentation, but I tried customizing it to run with ChatGPT (or Google AI Studio), and the results were quite exciting.


1. 🔍 Structure of Majin’s Prompt

Through analysis, Majin’s prompt has the following main components:

  • Role assignment for AI: The AI is not just a chatbot, but acts as a Data Scientist and Presentation Designer.

  • Absolute mission: From a piece of input text, the AI must output a JavaScript object array (slideData) that defines the entire slide structure.

  • Fixed blueprint: The prompt includes a Google Apps Script (GAS) framework, where you only need to replace slideData to generate Google Slides.

  • SlideData includes:

    • title: Slide title

    • content: Content (in the form of bullets, text, or tables)

    • pattern: Display type (Title, List, TwoColumn, Image, …)

    • speakerNote: Presenter’s notes

👉 The important point: The prompt does not directly create slides, but outputs JSON-like data that the GAS script uses to build the slides.


2. 🛠️ Customizing & Running with ChatGPT

First, download system prompt.md

🔧 Steps inside the Project

  1. Create a new Project → give it a name (e.g., Google Slide Auto Generator).

  2. Add a file → upload system prompt.md.

  3. In the Project Settings / Overview screen, you will find the Instructions (System message) box → paste the line:
    添付した「system prompt.md」に忠実に従ってください。

  4. (Meaning: Please strictly follow the attached system prompt.md).
    If you don’t see a dedicated “Instructions” field, ChatGPT may show “Description” or “Setup” instead → paste it there. It works as the System Prompt for the whole Project.

  5. From now on, in that Project, whenever you input raw text, ChatGPT will immediately reference system prompt.md and output both slideData + GAS code.

👉 In other words: the Project’s Instruction acts as a dedicated System Message for that workspace. The UI may look different, but it’s always under “Overview/Setup” when you open the Project.

Next, type a prompt about the content you want to make slides from → and it will generate slideData.

I tested it with content about LLMs and got the following result:

const slideData = [

{

type: ‘title’,

title: ‘The Busy Person’s Intro to Large Language Models’,

date: ‘2025.09.21’,

notes: ‘Re-recorded overview of LLMs focusing on what they are, how to run them, how they are trained, and why next-word prediction works’

},

{

type: ‘content’,

title: ‘Agenda’,

points: [

‘What is an LLM’,

‘Running a model locally’,

‘Training at scale’,

‘Why next-word prediction is powerful’,

‘Key takeaways’

],

notes: ‘Keep it practical and concrete. We start with the simplest mental model, then show inference vs training, then the intuition for why LLMs encode knowledge’

},

{

type: ‘section’,

title: ‘1. What is an LLM’,

notes: ‘Define an LLM at the simplest level and frame the talk around artifacts you can hold on disk’

},

{

type: ‘content’,

title: ‘LLM = Two Files’,

subhead: ‘Weights + Runner’,

points: [

‘Parameters file holds learned weights’,

‘Runner implements forward pass of the network’,

‘Self contained package runs offline’

],

notes: ‘Stress that inference can be simple and local. The interesting part lives in the parameters learned during training’

},

{

type: ‘content’,

title: ‘Example: Llama 2 • 70B’,

subhead: ‘Open weights from Meta’,

points: [

‘Sizes include 7B 13B 34B 70B’,

‘Open weights and paper enable local study’,

‘Closed APIs trade control for convenience’

],

notes: ‘Contrast open weights with closed APIs like hosted assistants without exposing internals’

},

{

type: ‘section’,

title: ‘2. Running a Model’,

notes: ‘Give a feel for local inference and why the demo used a smaller model for speed’

},

{

type: ‘process’,

title: ‘Local Inference Flow’,

subhead: ‘From files to generations’,

steps: [

‘Get weights file on disk’,

‘Compile or install a runner’,

‘Point runner to weights’,

‘Send a prompt’,

‘Stream generated tokens’

],

notes: ‘Mention that a 7B model is fast enough on a laptop while 70B is roughly an order of magnitude slower’

},

{

type: ‘compare’,

title: ‘Open Weights vs Closed API’,

leftTitle: ‘Open Weights’,

rightTitle: ‘Closed API’,

leftItems: [

‘Full local control’,

‘Offline capable’,

‘Tunable and inspectable’

],

rightItems: [

‘Best quality access’,

‘No infra to manage’,

‘Faster to integrate’

],

notes: ‘There is no universal winner. Choose based on control privacy latency and capability needs’

},

{

type: ‘section’,

title: ‘3. Training at Scale’,

notes: ‘Explain where weights come from and why training is expensive compared to inference’

},

{

type: ‘content’,

title: ‘Training Ingredients’,

subhead: ‘Data Compute Cost’,

points: [

‘Large curated text corpus’,

‘Massive GPU clusters for days’,

‘Significant budget for runs’

],

notes: ‘Use order of magnitude thinking rather than exact numbers. Emphasize engineering and data work beyond raw compute’

},

{

type: ‘timeline’,

title: ‘From Corpus to Weights’,

subhead: ‘Very high level lifecycle’,

milestones: [

{ label: ‘Collect and filter data’, date: ‘Step 1’, state: ‘done’ },

{ label: ‘Train on GPU cluster’, date: ‘Step 2’, state: ‘done’ },

{ label: ‘Evaluate and align’, date: ‘Step 3’, state: ‘done’ },

{ label: ‘Release weights and runner’, date: ‘Step 4’, state: ‘next’ }

],

notes: ‘Keep the audience at the bird’s eye view. The output is a weights artifact you can reuse everywhere for inference’

},

{

type: ‘section’,

title: ‘4. Why It Works’,

notes: ‘Bridge from mechanics to intuition about capability’

},

{

type: ‘content’,

title: ‘Next Word Prediction Objective’,

subhead: ‘Simple objective rich consequences’,

points: [

‘Model predicts a distribution over next token’,

‘Good prediction forces world knowledge’,

‘Patterns styles and relations get compressed’

],

notes: ‘Relate prediction to lossy compression intuition. To predict the next token the model must encode structure facts and relationships’

},

{

type: ‘content’,

title: ‘Common Misconceptions’,

points: [

‘It is not copy paste of the web’,

‘Bigger is not always better’,

‘Closed is not always better than open’

],

notes: ‘Clarify generalization vs memorization and the role of data quality and algorithms along with scale’

},

{

type: ‘section’,

title: ‘5. Takeaways’,

notes: ‘Land the plane with pragmatic guidance’

},

{

type: ‘content’,

title: ‘Practical Guidance’,

points: [

‘Choose model size for latency and cost’,

‘Use open weights for control’,

‘Use hosted APIs for frontier quality’

],

notes: ‘Map choices to product constraints such as privacy cost latency and maintainability’

},

{

type: ‘closing’,

notes: ‘Thanks for watching. Invite questions and link resources in the description’

}

];

Next steps

  1. Open the .md file on your computer.

  2. Copy the code from the .md file.

  3. Open Google Slides → create a new slide deck.

  4. Click Extensions → Apps Script.

  5. Paste the copied code into the Apps Script editor.

  6. Paste your slideData.

  7. Press Run


3. ✅ Experience & Results


  • Works well on ChatGPT: No need for Gemini, GPT-5 is enough.

  • Advantage: The prompt standardizes the output into a JSON-like object, making it easy to control.

  • Reference implementation:


📌 Conclusion

  • Majin’s prompt is a great framework to turn AI into an automatic slide design tool.

  • It doesn’t have to be Gemini — ChatGPT (GPT-5) also works well.

  • You just need to customize the input → and you can generate Google Slides for any topic (training, pitching, learning…).

👉 This article was written with reference to blogs by まじん (Majin):

Installing and Using GPT-OSS 20B Locally with Ollama

In this document, we will explore how to install and run GPT-OSS 20B — a powerful open-weight language model released by OpenAI — locally, with detailed instructions for using it on a Tesla P40 GPU.

1. Quick Introduction to GPT-OSS 20B

  • GPT-OSS 20B is an open-weight language model from OpenAI, released in August 2025—the first since GPT-2—under the Apache 2.0 license, allowing free download, execution, and modification.

  • The model has about 21 billion parameters and can run efficiently on consumer machines with at least 16 GB of RAM or GPU VRAM.

  • GPT-OSS 20B uses a Mixture-of-Experts (MoE) architecture, activating only a subset of parameters (~3.6B) at each step, saving resources and energy.

  • The model supports chain-of-thought reasoning, enabling it to understand and explain reasoning processes step by step.


2. Hardware & Software Preparation

Hardware requirements:

  • RAM or VRAM: minimum 16 GB (can be system RAM or GPU VRAM).

  • Storage: around 12–20 GB for the model and data.

  • Operating system: macOS 11+, Windows, or Ubuntu are supported.

  • GPU (if available): Nvidia or AMD for acceleration. Without a GPU, the model still runs on CPU but very slowly.

Software options:

  • Ollama: the simplest method; quick installation with a convenient CLI.

  • LM Studio: a graphical interface, suitable for beginners.

  • Transformers + vLLM (Python): flexible for developers, integrates well into open-source pipelines.


3. How to Run GPT-OSS 20B with Ollama (GPU Tesla P40)

3.1 Goal and Timeline

  • Goal: successfully run GPT-OSS 20B locally using Ollama, leveraging the Tesla P40 GPU (24GB VRAM).

  • Timeline: the first setup takes about 15–20 minutes to download the model. After that, launching the model takes only a few seconds.

3.2 Environment Preparation

  • GPU: Tesla P40 with 24GB VRAM, sufficient for GPT-OSS 20B.

  • NVIDIA Driver: version 525 or higher recommended. In the sample logs, CUDA 12.0 works fine.

  • RAM: minimum 16GB.

  • Storage: at least 20GB free space; the model itself takes ~13GB plus cache.

  • Operating system: Linux (Ubuntu), macOS, or Windows. The following example uses Ubuntu.

3.3 Install Ollama

The fastest way:

curl -fsSL https://ollama.com/install.sh | sh

Or manually (Linux):

curl -LO https://ollama.com/download/ollama-linux-amd64.tgz
sudo tar -C /usr -xzf ollama-linux-amd64.tgz

Start the Ollama service:

OLLAMA_HOST=0.0.0.0:8888 ollama serve

When the log shows listening on [::]:8888, the server is ready.

3.4 Download GPT-OSS 20B

Open a new terminal and run:

OLLAMA_HOST=0.0.0.0:8888 ollama pull gpt-oss:20b

The first download is about 13GB. When the log shows success, the model is ready.

3.5 Run the Model

Start the model and try chatting:

OLLAMA_HOST=0.0.0.0:8888 ollama run gpt-oss:20b

Example:

>>> hi
Hello! 👋 How can I help you today?

3.6 Verify GPU Usage

Run:

nvidia-smi

Result: the Tesla P40 (24GB) consumes around 12–13GB VRAM for the process /usr/bin/ollama. The Ollama log also shows “offloading output layer to GPU” and “llama runner started in 8.05 seconds”, proving the model is running on GPU, not CPU.

3.7 Monitor API and Performance

Ollama exposes a REST API at http://127.0.0.1:8888.
Common endpoints include /api/chat and /api/generate.

Response times:

  • Short prompts: about 2–10 seconds.

  • Long or complex prompts: may take tens of seconds to a few minutes.


4. Conclusion

You have successfully run GPT-OSS 20B on a Tesla P40. The initial model download takes some time, but afterward it launches quickly and runs stably. With 24GB VRAM, the GPU can handle the large model without overload. While long prompts may still be slow, it is fully usable for real-world experiments and local project integration.