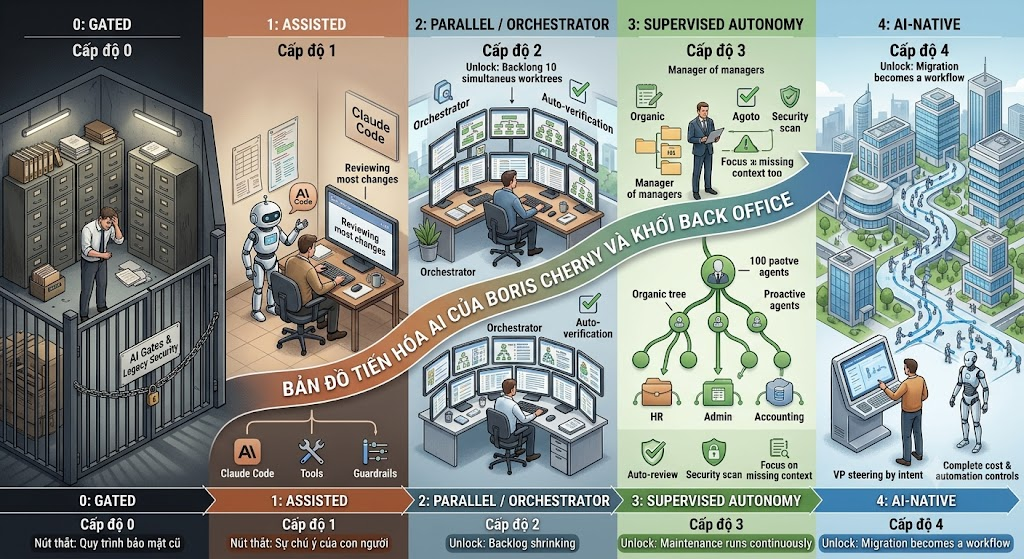
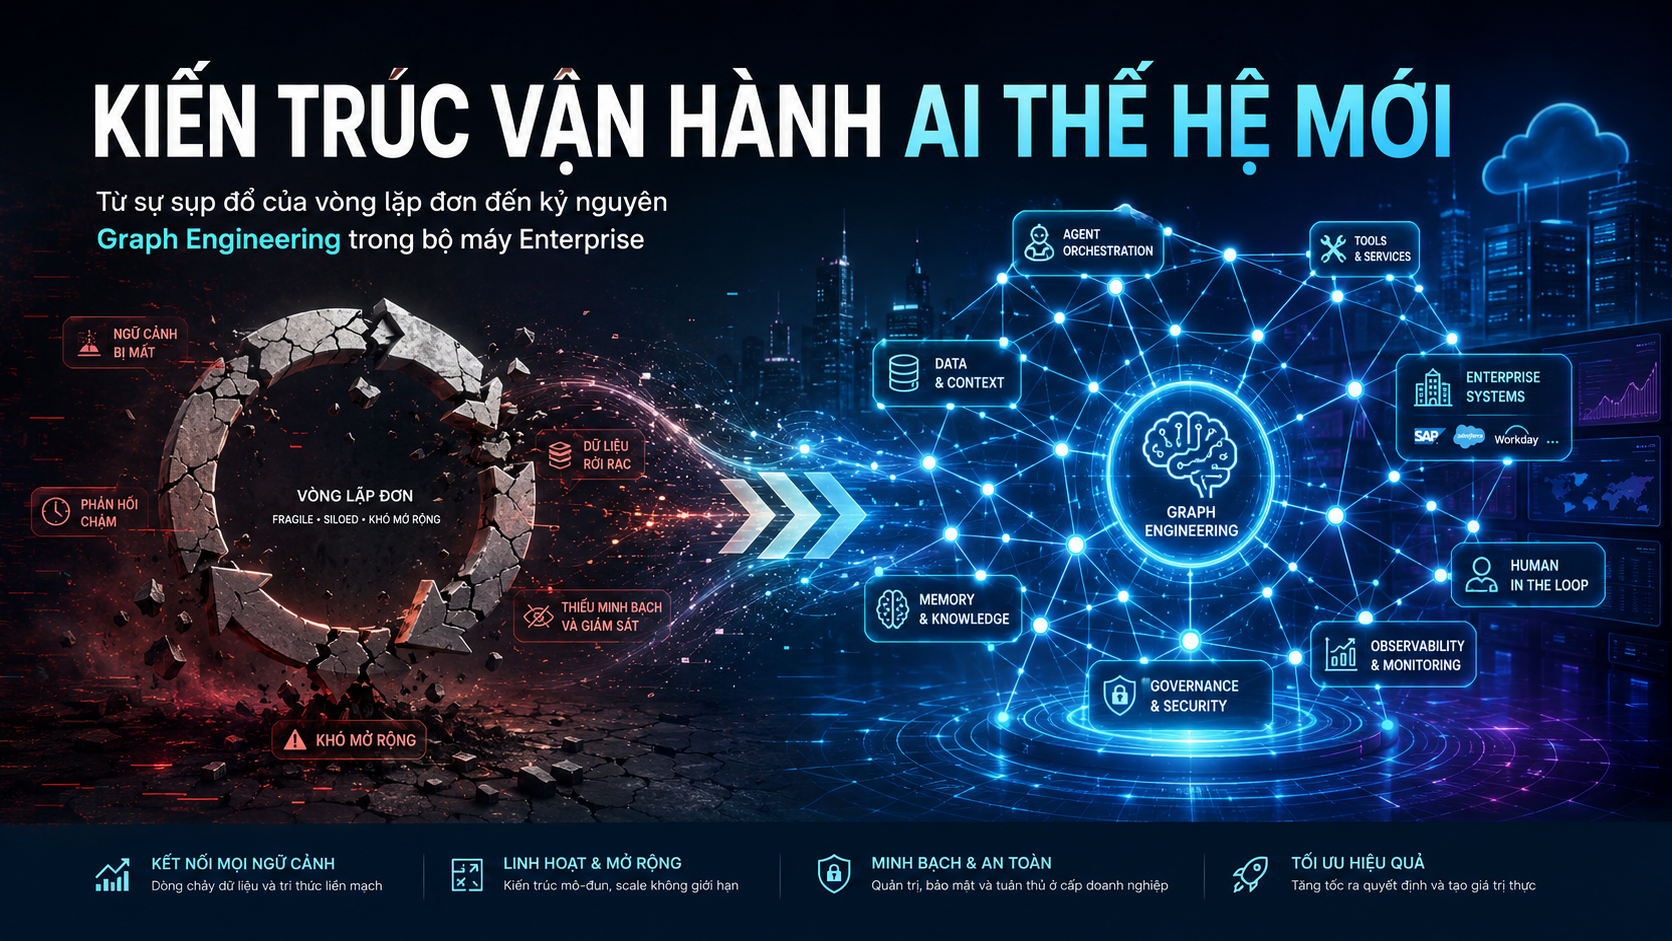
(Nguồn tham khảo dữ liệu gốc: https://claude.ai/code/artifact/bfdfaef9-bc62-4dfe-ba9e-c58a26c9accf PHẦN 1: LỜI MỞ ĐẦU – SỰ CHUYỂN DỊCH TẤT YẾU CỦA DOANH NGHIỆP TRONG KỶ NGUYÊN...
1. Feature overview Google announced on June 30, 2026 that Gemini in Google Slides can create a complete, multi-slide presentation from a single request....
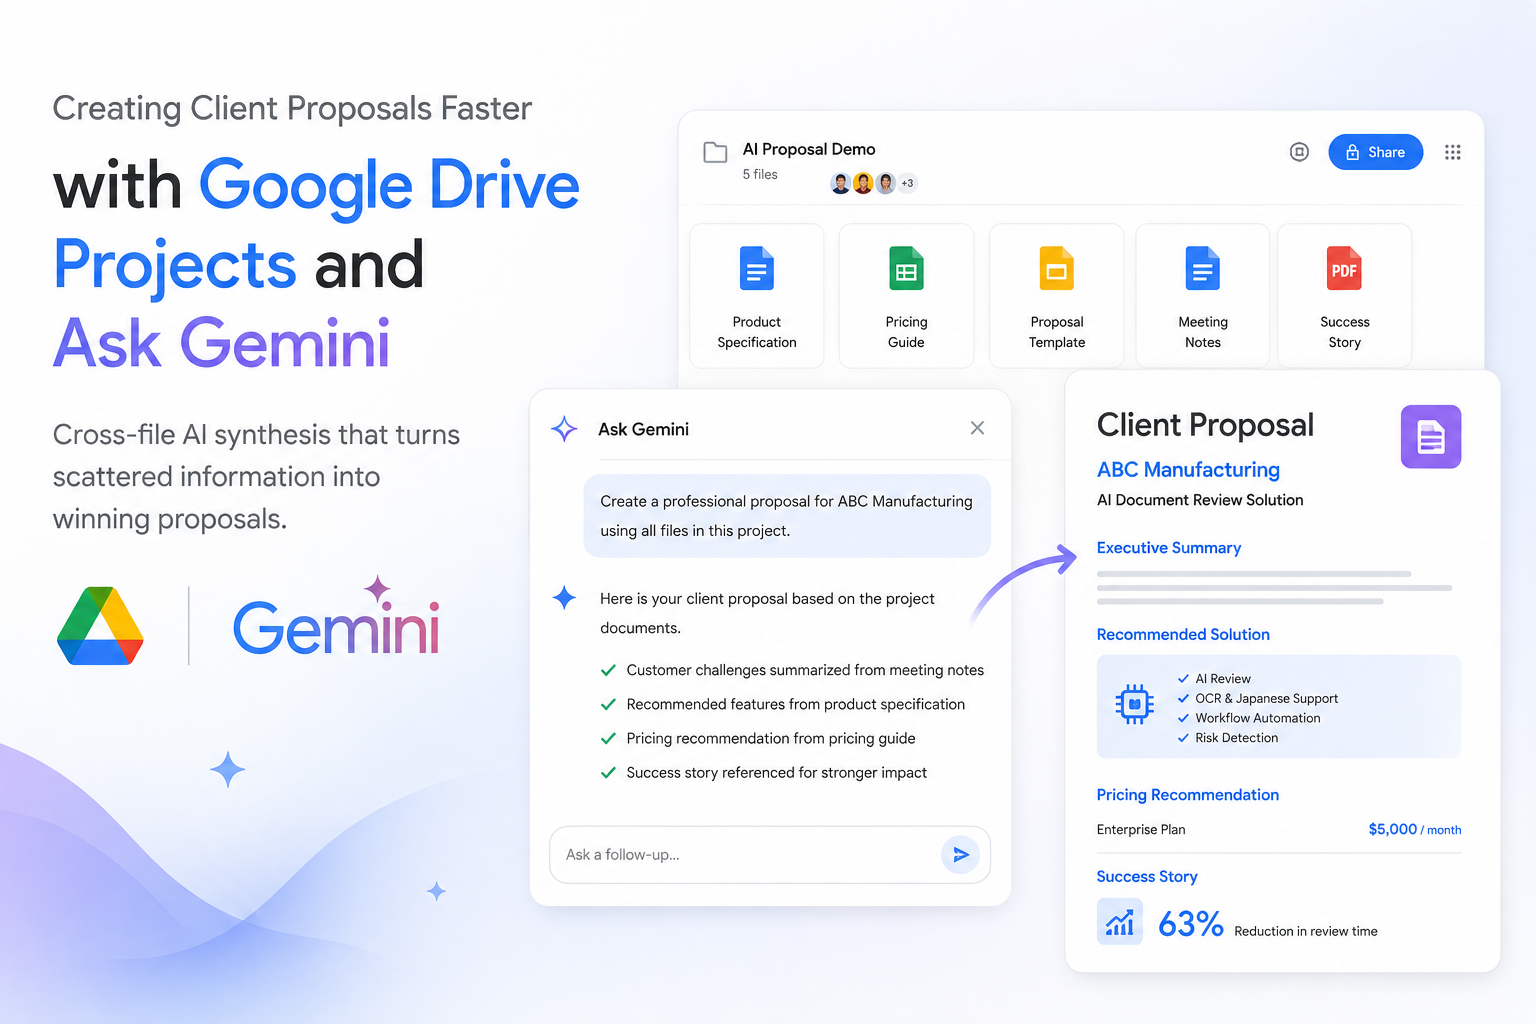
Introduction Preparing a proposal for a new client is rarely as simple as opening one document and starting to write. In reality, valuable information...