1. Introduction to the Launch of Gemini CLI
Recently, Google launched Gemini CLI – an open-source AI agent that can be directly integrated into the terminal for work. In previous articles about Claude Code CLI, we already saw its powerful features. Now, with the interesting arrival of Gemini CLI, users have even more options when choosing which agent to use. In this article, we’ll explore and compare the different criteria between Claude Code CLI and Gemini CLI to see which agent might best suit your needs.
2. Comparison Criteria Between the Two CLI Agents
a. Platform Support
-
Claude Code CLI: This tool has certain limitations when it comes to operating system support. It works well on MacOS and Ubuntu, but for Windows users, it requires extra steps such as installing an Ubuntu WSL virtual machine. Even then, there are still some restrictions and a less-than-ideal user experience.
-
Gemini CLI: Google’s new tool supports all operating systems, allowing users on any platform to set up and use it quickly and easily.
b. Open Source
-
Claude Code CLI: This is a closed-source tool, so its development is entirely controlled by Anthropic.
-
Gemini CLI: Google’s tool is open source, licensed under Apache 2.0, which enables the user community to access and collaborate on making the tool more robust and faster.
c. AI Model
-
Claude Code CLI: Utilizes powerful Anthropic models such as Claude Opus 4 and Claude Sonnet 3.7, both highly effective for coding tasks.
-
Gemini CLI: Gives access to Gemini 2.5 Pro and Gemini 2.5 Flash, each useful for different needs.
d. Context Limitations
-
Claude Code CLI: This is a paid tool. Users can access it through their Claude account with various tiers, each offering different token limits (from 250K to 1M tokens per model). Users can also use Claude’s API key to pay based on token usage.
-
Gemini CLI: Google’s tool provides a free version, which allows access to Gemini 2.5 Pro, but can quickly hit the limit and drop down to Gemini 2.5 Flash.
e. Community and Extensibility
-
Claude Code CLI: As a closed-source tool, only the developer (Anthropic) can improve and maintain it.
-
Gemini CLI: Being open source, it has a large and vibrant community contributing to its rapid improvement and greater capabilities.
3. Gemini CLI
-
Link: https://github.com/mhieupham1/Flashcard_GeminiCLI
-
Prompt Example:
-
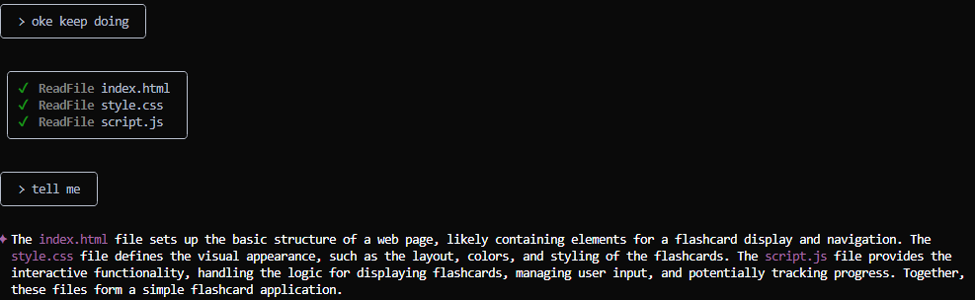
Please make for me a website about using flashcard for learning English with HTML, CSS, Javascript, do the best for UI/UX
-
A flashcard set can archive many words, user can add more word to a new set or existed set
-
Function for folder that can add existed flashcard sets or remove it
-
Function for flashcard set that can edit transfer user to a web to practice in this flashcard set
-
Dashboard need to have more eye-catching, good layout
-
And many prompts to ask Gemini CLI to fix their own bugs
-
Make the web has layout, functions like an official website with better CSS, JS, HTML
-
-
Strengths:
-
Can handle large token requests and good at reading context
-
Cost: Free version can access Gemini 2.5 Pro, but may quickly hit limits and fall back to Gemini 2.5 Flash. Sometimes, after logging out and back in, it works normally again with Gemini 2.5 Flash. A pro account offers a one-month free trial, after which users can cancel or continue with the stated price.
-
-
Weaknesses:
-
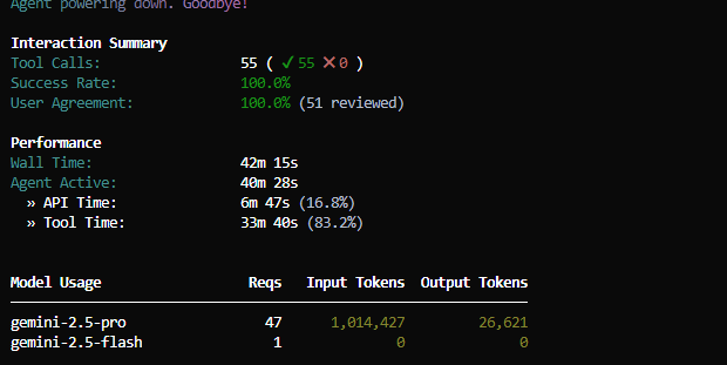
Requires a very large number of tokens (1M tokens for pro, 11M for flash) to build the website (even when incomplete)
-

-
-
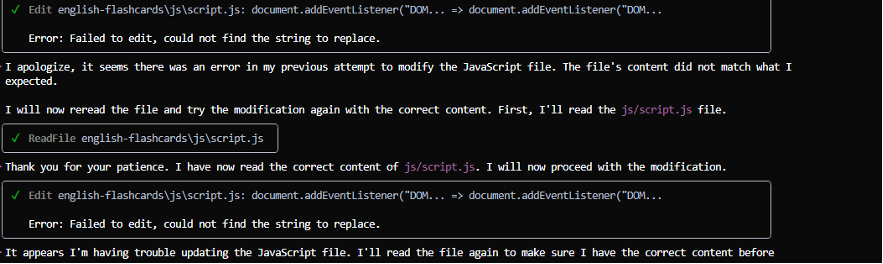
Prone to repeated error loops, wasting tokens
-
Codebase is still weak and doesn’t always fully understand user intentions or basic web concepts, so prompts need to be very detailed
-
4. Claude Code CLI
-
Link: https://github.com/mhieupham1/Flashcard_ClaudeCodeCLI
-
Prompt Example:
-
Please make for me a website about using flashcard for learning English with HTML, CSS, Javascript, do the best for UI/UX
-
A flashcard set can archive many words, user can add more word to a new set or existed set
-
Function for folder that can add existed flashcard sets or remove it
-
Function for flashcard set that can edit transfer user to a web to practice in this flashcard set
-
Dashboard need to have more eye-catching, good layout
-
-
Strengths:
-
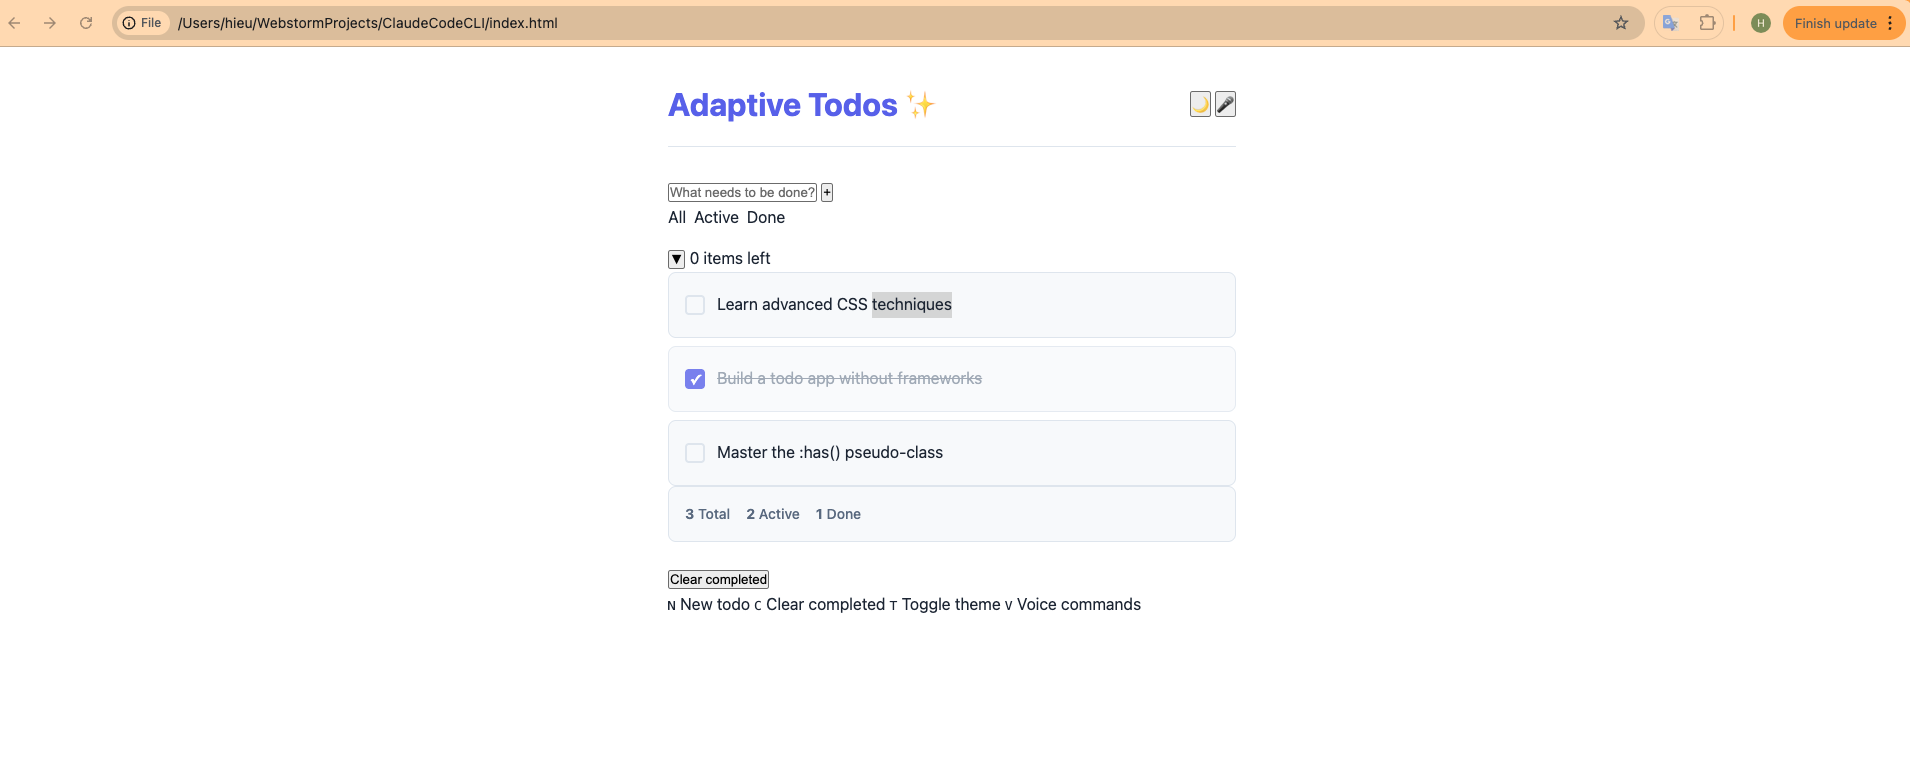
Understands user ideas very well, outputs high-quality, efficient, and minimal code without missing features
-
Only required 30K tokens for the flashcard web demo
-
Good, user-friendly UI/UX
-
Produced the demo with a single request (using only a pro account, not the max tier)
-
-
Weaknesses:
-
Requires a paid account or API key (tokens = dollars), but the code quality is worth the price
-
5. Conclusion
With the comparison above, it’s clear that Gemini CLI is currently much stronger than Claude Code CLI. However, a deeper dive into their practical efficiency and benefits for different use cases is still needed.
a. Gemini CLI
-
Strengths:
-
Free to use with high token limits, suitable for large projects needing a large context window
-
Highly compatible across platforms and easy to set up
-
Open source, ensuring rapid improvement through community contributions
-
Fast code reading and generation
-
-
Weaknesses:
-
Can randomly hit usage limits, dropping from Gemini Pro 2.5 to Gemini Flash 2.5, reducing effectiveness
-
Prone to repeated errors/loops, which can be difficult to escape’
-
-
-
Codebase may not be as efficient, often needing very detailed prompts
-
b. Claude Code CLI:
-
Strengths:
-
High-quality, thoughtful, and efficient codebase generation
-
Highly suitable for commercial projects thanks to token optimization
-
-
Weaknesses:
-
Requires a paid account, with different tiers for different performance levels; top tier is expensive
-
Limited cross-platform compatibility, making it less accessible or offering a poorer experience for some users
-
6. Which Should You Use? Summary of Best Use Cases
When is Claude Code CLI most convenient?
Claude Code CLI is the better choice if you prioritize high-quality, efficient, and minimal code output, especially for commercial projects that require clean UI/UX and robust functionality. It is also ideal when you want to achieve your result in a single, well-phrased prompt. However, you need to be willing to pay for a subscription or API access, and set up the tool on a supported platform.
When is Gemini CLI more convenient?
Gemini CLI is perfect if you need a free, open-source tool that works across all major operating systems and is easy to install. It’s best for large projects that require handling a lot of data or context, and for those who want to benefit from fast community-driven improvements. Gemini CLI is especially suitable for personal, experimental, or learning projects, or when you need flexibility and cross-platform compatibility—even though it might sometimes require more detailed prompts or troubleshooting.