NDA SIGNING PROCESS WITH PARTNERS VIA GOOGLE DRIVE ESIGNATURE
by
Truong Vu
April 4, 2026
In the digital workplace era, printing, hand-signing, and scanning contracts has become obsolete. Google Workspace now integrates a built-in eSignature feature, allowing you to complete the signing process directly within Google Drive.
Today, I will guide you through the process of signing an NDA (Non-Disclosure Agreement) with a Vendor using this tool.
1. Context
AI Solutions needs to sign an NDA with a Cloud service provider to kick off a project. Instead of using expensive third-party software, we will use Google Drive to:
Send signature requests.
Track status in real-time.
Store records with legal evidence (Audit Trail).
2. Process Demo (Step-by-Step)
Step 1: Prepare the PDF File
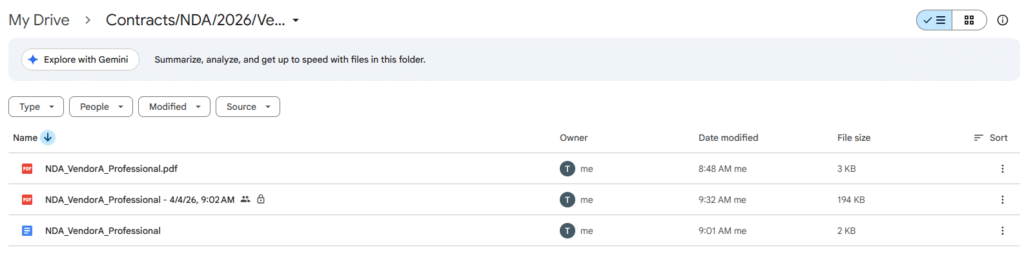
First, I create a professional folder: Contracts/NDA/2026/Vendor_A. I upload a sample file: NDA_VendorA_Dummy_v1.pdf. (Note: This is a dummy file containing no sensitive information).
Step 2: Initialize eSignature
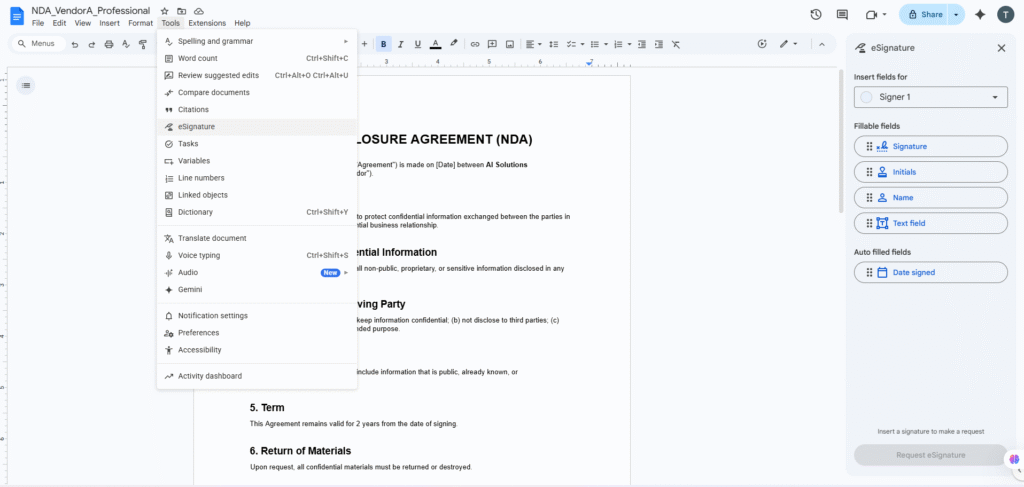
Open the PDF file with Google Docs, select the eSignature icon (or go to menu Tools > eSignature).
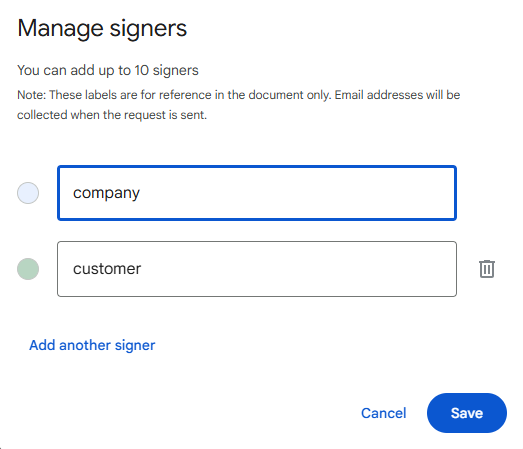
Signer 2: Your company representative (If bilateral signing is required).
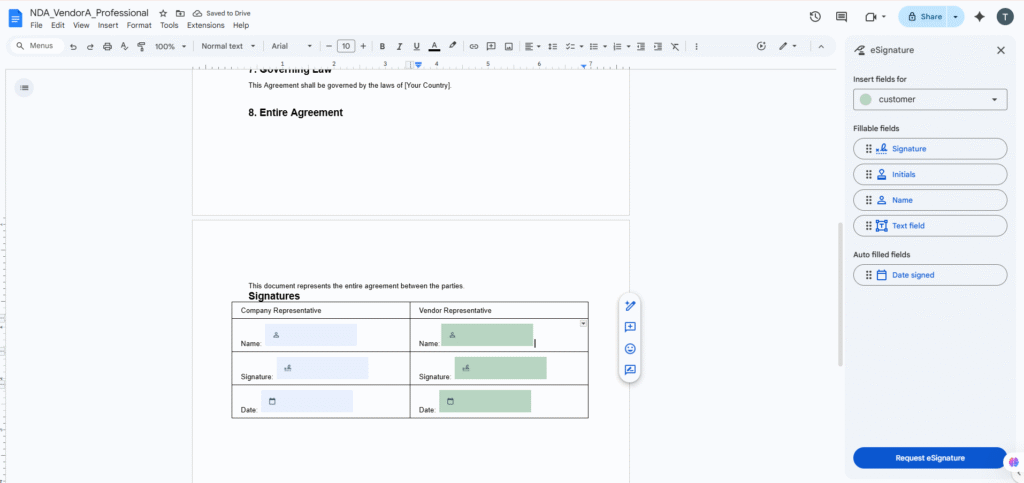
Drag and drop the information fields into the PDF:
Signature
Date signed
Full name
Step 4: Send Signature Request
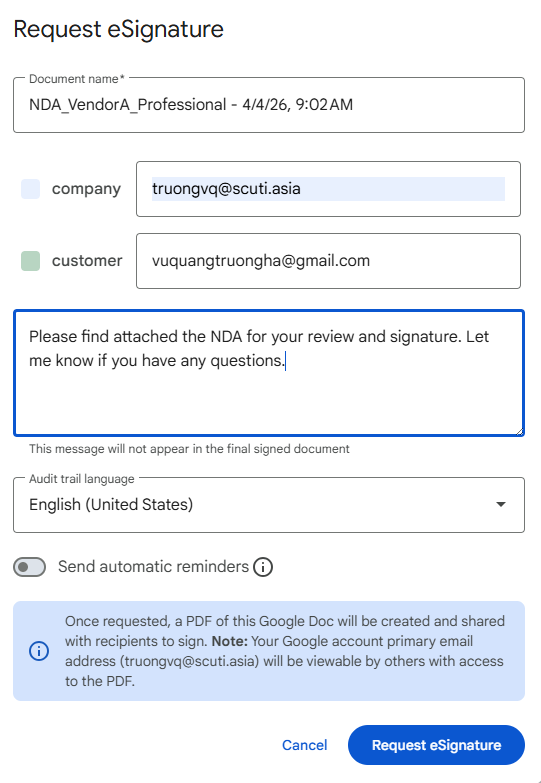
After checking, click “Request signature.” You can write a message to the partner.
To ensure a smooth operation, pay attention to these two items:
Audit trail language: Choose the language for the legal evidence page (Audit Trail) that will be attached to the end of the file after completion. Usually, English or a common language used by both parties should be selected.
Send automatic reminders: You should toggle this On. The system will automatically send reminder emails to the partner if they haven’t signed after a period of time, saving you from manual follow-ups.
Review all recipient information and click the blue “Request eSignature” button. Google will send emails to the configured accounts.
Important note after sending:Do not move the file: While the signing process is ongoing (Pending), avoid moving the original file to another folder or renaming it on Drive to prevent disrupting the signature flow.
3. Tracking & Audit Trail
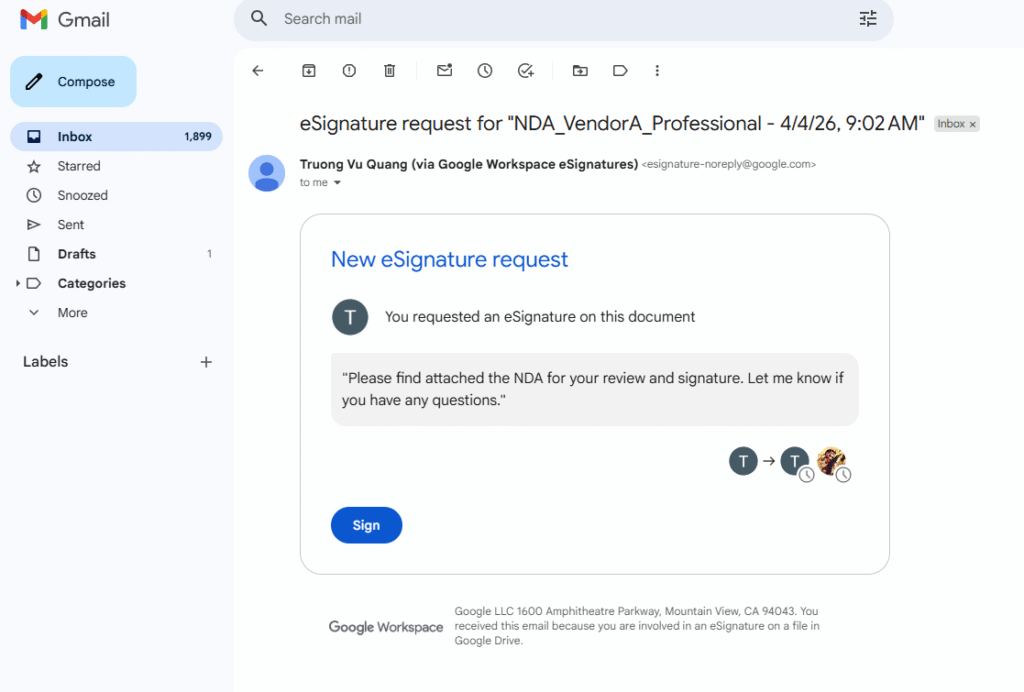
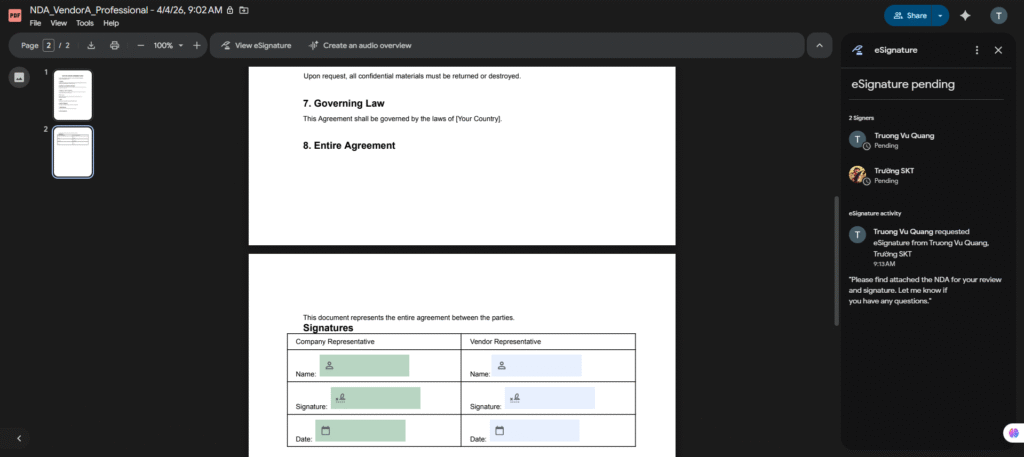
Status Tracking
Immediately after sending, the file status will be Pending. You can view progress in the eSignature toolbar:
Waiting for signatures: In progress.
Complete: Finished.
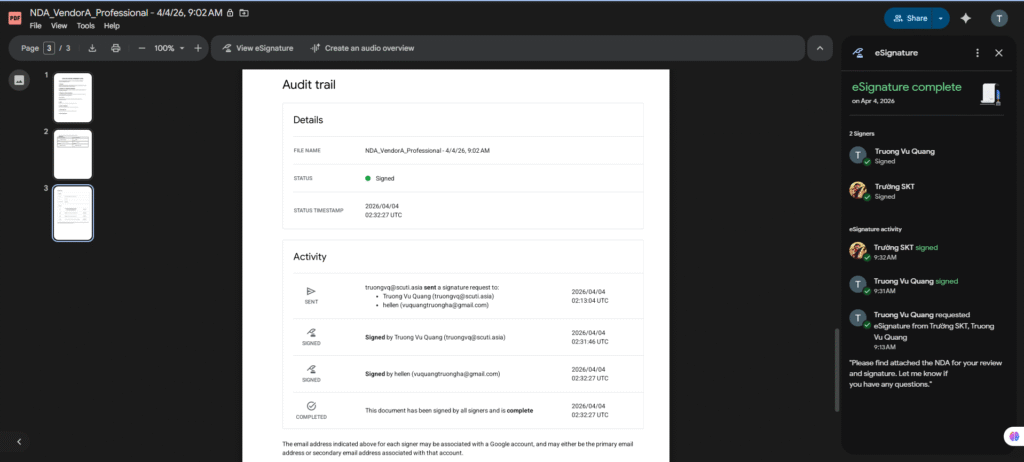
Audit Trail (Signing History)
Once all parties have signed, Google will automatically generate an Audit Trail page attached to the end of the PDF file. This page records:
Timestamp
Identifying Email
4. Operational Rules
Signer Authentication: The system relies on Google Account login (Email) to verify identity.
Reminder: You can access the eSignature management panel to send a reminder email if the partner forgets to sign.
Cancel Request: You can cancel the request at any time before all parties have finished signing.
Version Control (Critical): If the original PDF is modified after the signature request has been sent, the request will be invalidated to ensure integrity. You must restart the process with the new version.
5. Storage Confirmation
File Location: The fully signed file will be automatically saved in a subfolder named “Signed” at the same location as the original file.
File Name: Will follow the format: NDA_VendorA_v1_signed.pdf.
Search Method: You can use the keyword type:signature in the Drive search bar to quickly filter all signed documents.
Failure Mode – Real Issues & Troubleshooting
During actual implementation, you may encounter some “bottlenecks.” Here are the 4 most common situations and quick solutions:
Error 1: Signer reports “Permission Denied”
Symptom: Partner receives the invite email, but clicking “Review and Sign” triggers a “no permission to view” error.
Cause: The original file on Google Drive is blocked from being shared outside the organization (usually due to your company’s security policy).
Fix: 1. Go to Share for the original PDF. 2. Ensure sharing settings allow “Anyone with the link” or at least grant Viewer access directly to the signer’s email. 3. Ask the partner to refresh the signing page.
Error 2: Incorrect Signer Email
Symptom: You accidentally typed [email protected] instead of gmail.com and clicked “Request eSignature.”
Cause: Manual data entry error.
Fix: You cannot edit the email after sending to ensure legal validity. You must go to the eSignature dashboard -> Select View Details -> Click Cancel request. Then, create a new request with the correct email.
Error 3: Locked PDF / Unable to Insert Signature Fields
Symptom: You upload the PDF, but “Signature” and “Name” buttons are grayed out or cannot be dragged into the file.
Cause: The original PDF is encrypted, password-protected, or is an incompatible dynamic XFA form.
Fix: 1. Open the PDF on your computer, select Print. 2. Choose “Save as PDF” or “Microsoft Print to PDF” to create a “clean” copy (without encryption). 3. Upload this copy to Drive and restart the process.
Error 4: Content Changes After Request is Sent (Outdated Version)
Symptom: After sending the NDA, you find a typo and fix the original file.
Cause: Google eSignature works based on a “snapshot” of the document at the time of sending.
Consequence: The pending request will be automatically Invalidated to prevent parties from signing content changed behind their backs.
Fix: You are required to restart the Request eSignature process from the beginning for the modified version.