1. What is Google Stitch?
Google Stitch is a Google Labs AI tool introduced around Google I/O 2025. It helps you generate UI screens quickly from text prompts and (in many cases) from reference images like sketches, wireframes, or screenshots. The goal is rapid exploration: generate, iterate, partially update, and export.
Website: stitch.withgoogle.com

2. Main features (summary)
🎨 Text-to-UI generation
Type a prompt in “Describe your design” to generate a UI for App or Web. Stitch also provides sample prompts and lets you choose a model (e.g., “3.0 Pro”).
🖼️ Image-to-UI (Image to Design)
Click the “+” icon inside the prompt box (or drag & drop) to upload a sketch/wireframe/screenshot, optionally add a short instruction, then generate a polished UI.
🔄 Multiple variations
After generating a design, use Variations (when available) to create multiple alternatives (layout / color / component style / typography) and pick the best direction.
✏️ Partial update via Annotation (preview)
In Edit mode, open Annotate (preview), mark a region (rectangle/arrow/freehand), write “Describe your change”, then apply to update only that part.
🎨 Theme editing (appearance, colors, radius, fonts)
Select a design → Edit → Edit theme to adjust Appearance (Light/Dark), Color, Corner radius, and Font with real-time preview.
📤 Export to Google AI Studio
Select a design → More → Export → AI Studio → Build with AI Studio, then continue building and generating code in AI Studio.
3. Step-by-step: How to make a mockup in Stitch
3.1. Initial setup
1. Open Stitch and sign in
Go to stitch.withgoogle.com and sign in with your Google account.
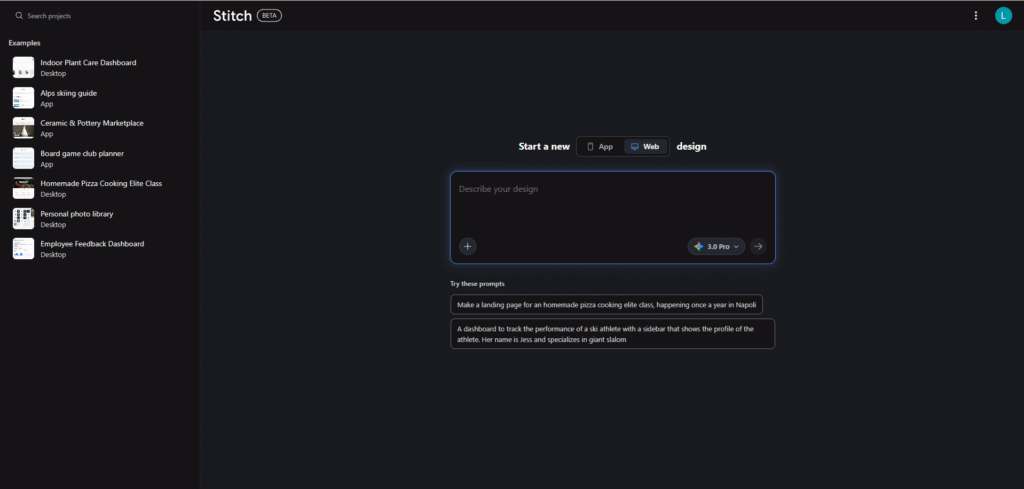
2. Understand the home screen
After signing in you typically see:
- Left sidebar: “Examples” (sample projects)
- Center: “Describe your design” prompt box
- Top bar: Stitch (BETA), search (“Search projects”), menus/profile
- Model dropdown: e.g., “3.0 Pro”
3. Choose design type
In “Start a new”, choose App or Web.
3.2. Make a single design
1. Select App or Web
Choose App or Web in “Start a new”.
2. Write the prompt
In “Describe your design”, write a clear prompt. Examples:
- “Make a catalog page with seasonal home decor items, minimalist grid, filters by season. Light orange theme.”
- “Make me an app for discovering California activities and getaways. Focus on destinations, musical events, and easy trip planning.”
- “Mobile app login screen with email + password fields, blue gradient background.”
Tip: Use the built-in sample prompts as a starting point.
3. (Optional) Pick a model
Select a model from the dropdown (e.g., “3.0 Pro”).
4. Generate
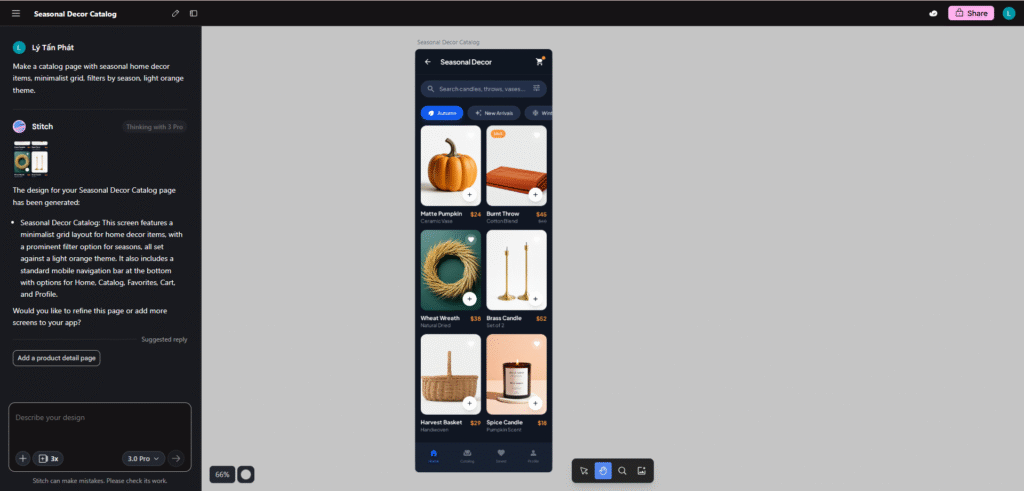
Click the arrow (→) or press Enter to generate. The design will appear on the canvas.
5. Review the output
You can zoom in/out, select the design, and start editing.
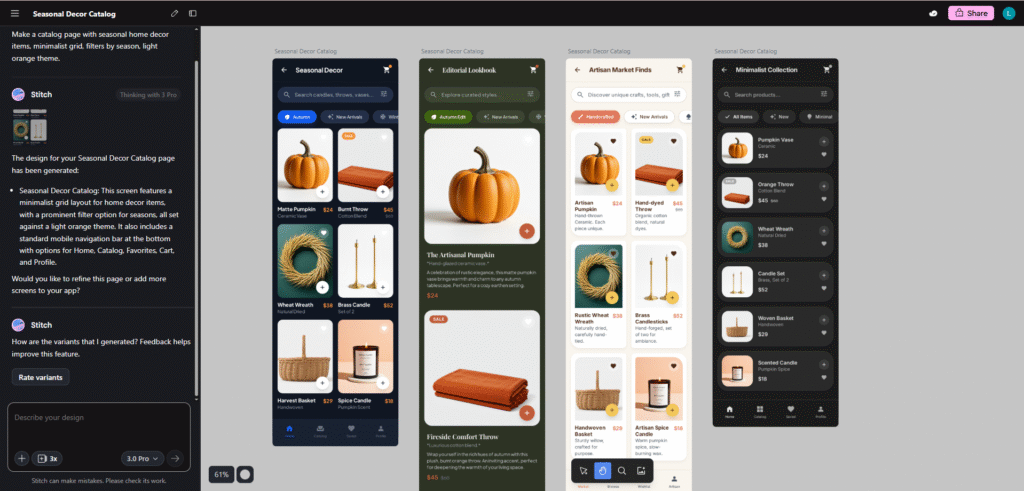
3.3. Make multiple variations
1. Select the generated design
Click the design on the canvas to select it.
2. Open Variations (if available)
Find Variations / Generate Variations. If you don’t see it, re-prompt with a “Create 3 variations…” instruction.
3. Choose variation types
If a panel appears, choose what to vary:
- Layout variations
- Color scheme variations
- Component style variations
- Typography variations
4. Review and pick
Compare the generated options and continue editing the best one.

3.4. Image to Design
1. Prepare an image
Use any of the following:
- Sketch
- Wireframe
- Screenshot (reference UI)
2. Upload the image
Click the “+” icon in the prompt box, or drag & drop the image into the prompt area.
3. Add a short instruction (recommended)
Example: “Convert this wireframe into a polished web dashboard.”
4. Generate
Click the arrow (→). Stitch will generate a design based on the image + instruction.

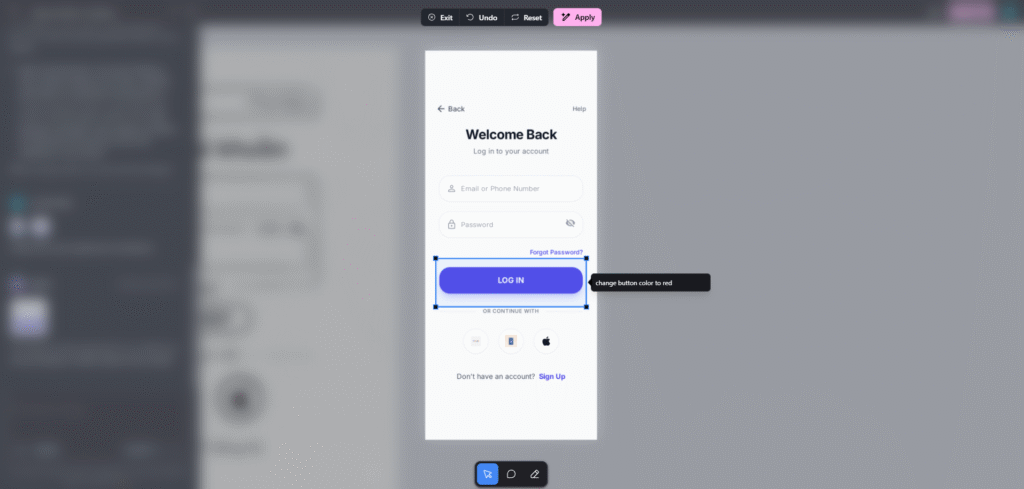
3.5. Partial update — Annotation (preview)
1. Enter Edit mode
Select the design on the canvas, then click Edit.
2. Open Annotate (preview)
In Edit, click Annotate (preview).
3. Mark the region
Use rectangle/arrow/freehand to mark what you want to change.
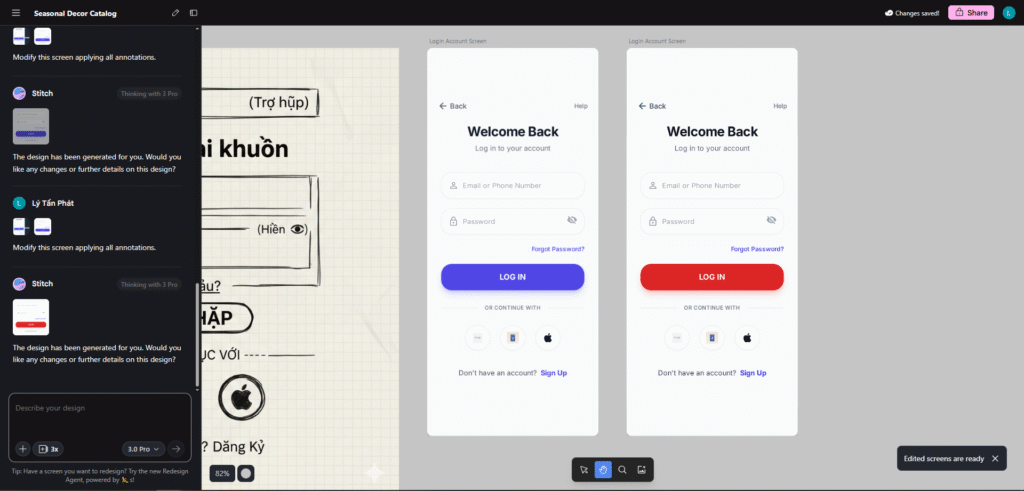
4. Describe your change
Write a precise instruction (e.g., “Change this button color to red”).
5. Apply
Click Apply to update only the annotated area.
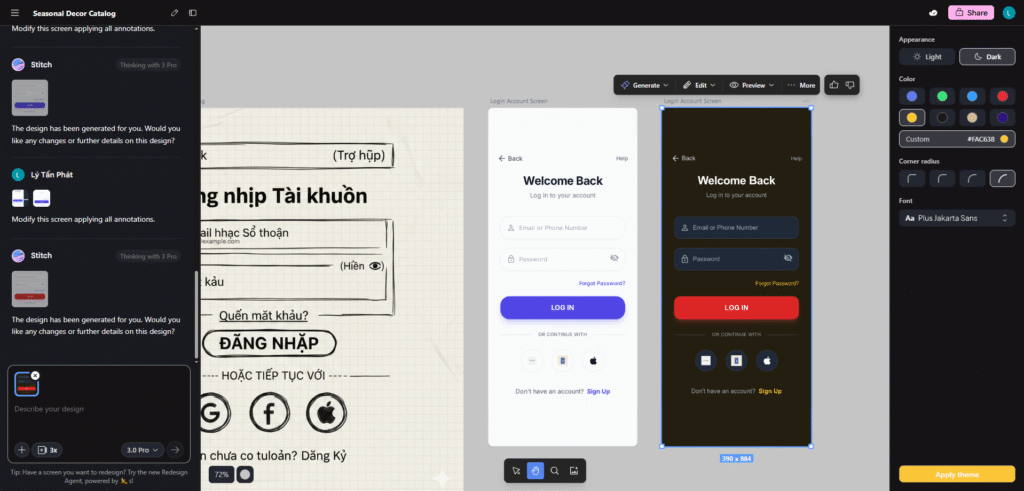
3.6. Adjust color balance (Theme editor)
1. Select the design
Click the design on the canvas to select it.
2. Edit → Edit theme
Click Edit, then click Edit theme.
3. Appearance
Choose Light or Dark in Appearance.
4. Color / Corner radius / Font
- Color: pick palette and primary colors
- Corner radius: adjust rounding across components
- Font: choose typography for the whole design
Changes preview in real time.
5. Apply / Save
Click Apply or Save (depending on UI) to apply the theme changes.
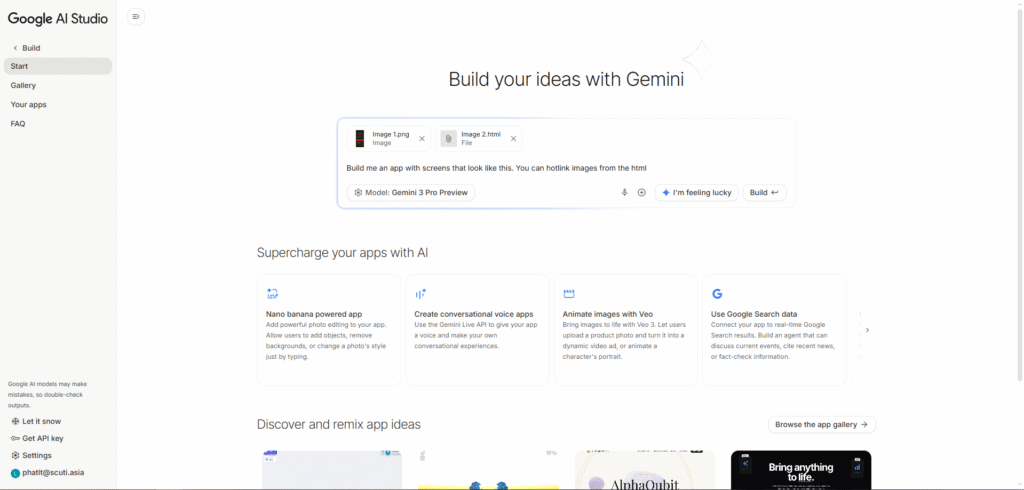
3.7. Export to Google AI Studio
1. Select your design
Make sure your design is ready, then select it on the canvas.
2. More → Export → AI Studio
Click More (⋯) → Export → AI Studio.
3. Build with AI Studio
Click Build with AI Studio to open the project in Google AI Studio.
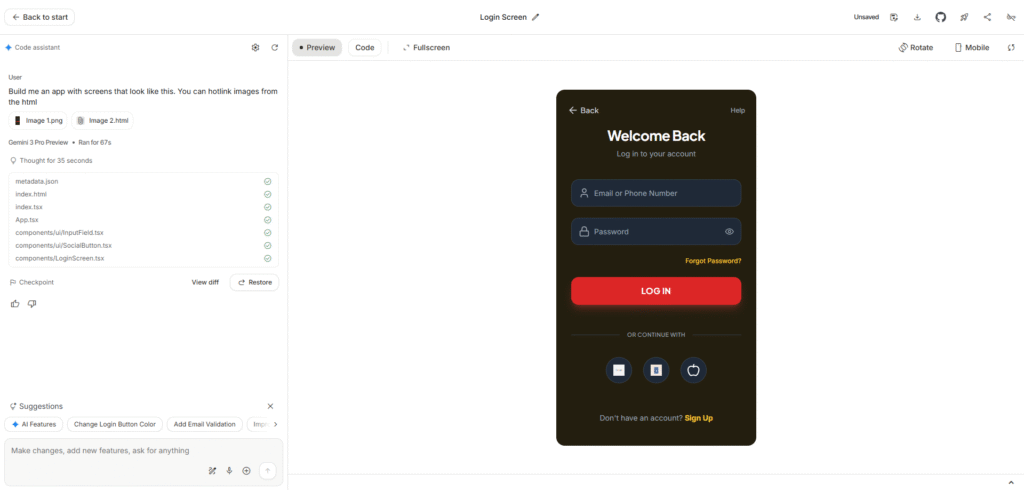
4. Build in AI Studio
AI Studio will open with your image and a prefilled prompt like: Build me an app with screens that look like this. You can hotlink images from the html Then click Build to generate code and screens.

4. Is Stitch convenient for mockups?
✅ Pros
- Very fast iteration: go from idea to screens in minutes.
- Low barrier: useful even if you’re not a full-time designer.
- Multiple directions: variations help explore options quickly.
- Partial edits: annotation-based updates reduce rework.
- Good integration: export to AI Studio to continue building.
⚠️ Limitations
- Credits are limited: Stitch uses credits (see Settings → “Usage today”, e.g., Daily credits and Daily redesign credits such as 0/150 and 0/15). Heavy iteration can hit daily limits.
- Prompt quality matters: vague prompts produce generic results.
- Still needs human refinement: spacing, hierarchy, accessibility often need manual polish.
- Preview/experimental features: some flows may change over time.
🎯 Verdict
Yes — Stitch is convenient for mockups, especially for early-stage product design and rapid prototyping. For production-ready UI systems, you’ll still want a design tool and human review.
5. Best use cases
🚀 Rapid prototyping
Create quick visuals to validate ideas and communicate with stakeholders.
💡 Exploring multiple UI directions
Generate variations and compare layouts, styles, and themes.
📱 App / Web MVP design
Generate starter screens for MVPs, then refine with a designer/developer.
🎨 Theme and design-system experiments
Quickly test Light/Dark, colors, radius, and fonts across screens.
📸 Turning sketches into digital screens
Convert wireframes/sketches into more polished UI to speed up the workflow.
6. Tips & best practices
💡 Writing better prompts
- Specify App vs Web
- Describe the main layout (header/sidebar/cards/forms)
- Include style cues (minimal, playful, enterprise, etc.)
- List key components (filters, tables, CTA buttons, etc.)
🎯 Getting better variations
- Start from one strong base screen
- Ask for specific variation types (layout vs color vs typography)
- Mix-and-match the best parts
✏️ Using annotations effectively
- Mark the smallest region that needs change
- Write clear and specific instructions
- Apply small changes first, then iterate